At this time, leave server B turned off.
A screen similar to the following appears:
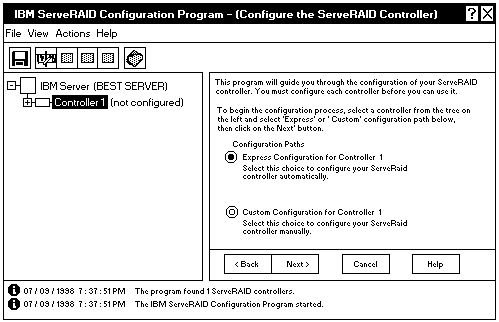
Figure 1. Configuration Mode Screen
 -Important- The ServeRAID adapter only should be initialized one time
when the adapter is first installed.
-Important- The ServeRAID adapter only should be initialized one time
when the adapter is first installed.
Initializing the adapter removes all configuration information from NVRAM.
This information includes the SCSI IDs, the cluster and the cluster partner name, and the array information.
This point is especially important if the Windows NT system boot drive is attached to the IBM ServeRAID adapter.
If the initialization occurs after the boot drive array has been created, this array information will be removed
and the server will not be able to startup into Windows NT.
If a confirmation window appears, click on Yes.
Note: Do not attempt to change the host ID on both ServeRAID adapters in a pair at the exact same time.
Doing so can cause a problem, such as a server 'lock-up.'
-Important- If your configuration will contain multiple ServeRAID adapter
pairs, each adapter Host Configuration ID must be unique.
The name of the Host ID and the Cluster Partner ID are case sensitive.
- Host ID - Enter a name for the Host ID for the first controller, for example, Server_A.
- Cluster Partner ID - Enter a name for the Cluster Partner ID for the first controller, for example, Server_B.
Note: Servers cannot have the same initiator_identifier IDs.
- Initiator Identifiers (Channels) - The system presets these to an unused value, for example, 6.
Note: Be sure to record the Host IDs and Cluster Partner IDs in a safe place for future reference.
You will need this information to recover the configuration if the ServeRAID adapter should fail.
Notes:
- When creating logical drives, be aware of the following way in which the information is displayed on the ServeRAID
configuration program screens.
You only should create one logical drive for each array when defining shared logical drives for use in a cluster
When logical drives are created, they appear on the screen in the order they are created.
For ease of understanding, create an array and then all logical drives for that array before you create another array.
If they are created in that order, they will appear on the screen as shown in the first figure.
(***** is other information that will appear on the screen, such as RAID level, Write Policy, and so on, but is not needed for this explanation).A ***** A0 ***** ***** ****** ****** *****
B ***** B0 ***** ***** ****** ****** *****
C ***** C0 ***** ***** ****** ****** *****
If logical drives are created out of order, meaning you do not follow the order mentioned above, then they are listed on the screen out of order, which might cause some confusion.
For example, say you created two arrays, A and B, but did not define any logical drives at that time.
Then, afterwards, you go back and create a logical drive on array B.
That logical drive will then appear in the first line of the logical drive box.
Now, if you go back and create another logical drive on array A, that logical drive will show up on the second line of the logical drive box, as shown in the second figure.A ***** B0 ***** ***** ****** ****** *****
B ***** A0 ***** ***** ****** ****** *****
- Hot-Spare/Standby Hot-Spare (HSP/SHS) devices must be defined only on a shared channel and each adapter must
have its own HSP/SHS device defined.
This means that the same HSP/SHS device must not be defined to both adapters in the adapter pair.
For example: if node A has a particular drive set for hot-spare, this same drive on node B should remain in a Ready state.
- Click on the ServeRAID controller that you want to configure in the Main Tree.
- Click on the Custom Configuration radio button.
- Click on the Next button.
Notes: p. 1) You must have two or more drives for RAID level 1 and three or more drives
for RAID level 5 within the same array.
2) In the Windows NT environment, you must create at least one logical drive,
the quorum drive, as RAID level-1 to store the quorum resource information.
This drive can be used to store customer programs and data. - Using the right mouse button, click on the drive or SCSI Channel icons in the Main Tree
to select the drives that you want to add to your arrays, delete from your arrays, or define
as hot-spare drives; then, select a choice from the pop-up list.
or
Drag the drive or SCSI Channel icon from the Main Tree and drop it on the Array or Hot-Spare Drive icon in the Main Panel on the right.
If you change your mind, you can drag the icons back to the Main Tree to remove them from the configuration. - After you select the data drives for your arrays and define your hot-spare drives, click on the Next button.
If you change your mind, you can:
- Remove a specific drive from a newly defined array or delete an entire newly defined array.
To do this, click on the Back button, use the right mouse button to click on the specific drive or Array icon in the Main Panel on the right, and then select Remove from New Array or Delete New Array. - Remove a specific hot-spare drive or all newly defined hot-spare drives.
To do this, click on the Back button, use the right mouse button to click on the Hot-Spare Drive icon in the Main Panel on the right, and then select Remove New Hot-Spare Drive or Remove All New Hot-Spare Drives.
- Remove a specific drive from a newly defined array or delete an entire newly defined array.
- Select a RAID level for the logical drive from the RAID pull-down menu in the Main Panel.
(Refer to the ServeRAID documentation for descriptions of the supported levels.) - Move the sliding bar in the Main Panel from right to left to allot data and parity space for the logical drive.
Notes:
1) Some operating systems have size limitations for logical drives.
Before you save the configuration, you might want to verify that the size
of the logical drive is appropriate for your operating system.
See your operating-system documentation for more detailed information.
2) Typically, the first logical drive defined on the first ServeRAID adapter
found by system BIOS during startup will be your startup (boot) drive. - Click on the Next button.
- Review the information that appears on the Configuration Summary screen.
Note: To change the configuration, click on Modify icon button.
- Click on the Apply to accept and save the configuration.
Note: For Microsoft Windows NT clusters, you should define all shared logical drives on server A.
Then, continue with step 12.
To set the Merge IDs, do the following: :
Note: Shared and Non-Shared Merge ID considerations:
- Shared logical drives must have unique Merge IDs.
- Valid Merge IDs for non-shared logical drives are 200-215. An example would be to set all non-shared drives on server A to Merge ID 206 and all non-shared drives on server B to Merge ID 207.
- The Merge ID must be unique for each shared logical drive that will be shared by the adapter pair.
For example, if you have a logical drive with a merge ID of 1 on server A, you cannot assign the same merge ID to a logical drive on server B.
Valid IDs for shared logical drives are 1 to 8.
 ) or Down Arrow (
  ) and then press Enter.
