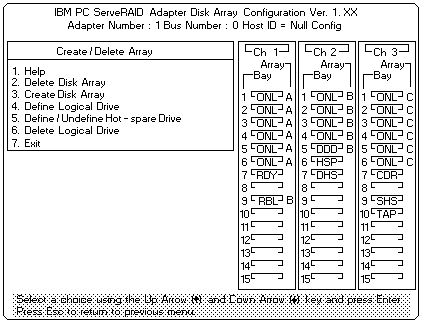
Note: To create an array using hard disks in an existing array, refer to 'Redefining Space in an Array'.
The cursor will be active in the Bay/Array selection list.

 Carefully determine which drives to include in the array before beginning the selection process. If
you change your mind after selecting the drives for an array, you can delete the array (by selecting Delete Disk Array from the Create/Delete Array menu)
and then begin again.
 ) key or the Down Arrow
(
  ) key to highlight the drive and then pressing
Enter. As you select each drive, the
status will
change from RDY (Ready) to ONL (Online).
Note:
- When the stripe unit size is 8K or 16K, the maximum number of drives in an array is 16.
- When the stripe unit size is 32K or 64K, the maximum number of drives in an array is 8.
- Define the logical drive or drives for this array, then create another array and its logical drives. See 'Defining Logical Drives'.
- Create another array now by repeating steps 2 through 5 in
this procedure, then define logical drives for both arrays.
Note: You must define at least one logical drive for each created array before you can exit from the configuration program.
- Continue with 'Defining Logical Drives'
