Removing the Processor Assembly
Removing the Processor Assembly
Complete this procedure to remove the processor assembly.
- Remove all media (diskettes, CDs, optical discs, or tapes) from the drives.
- Turn off the server and any attached devices.
- If you are in the United Kingdom and have a modem
or fax machine attached to the server, you must
disconnect the telephone line from the server before
unplugging any power cords (also known as power
cables). When reassembling the server, you must
reconnect the telephone line after you plug in the
power cords.
- Disconnect all power cords (cables) from electrical outlets.
- Disconnect all power cords from the server.
- Disconnect all communication cables from external receptacles.
- Note the location of the remaining cables and cords;
then, disconnect them from the server.
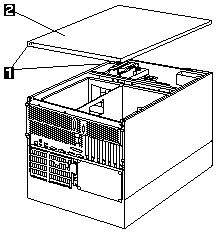
- Unscrew the top cover thumbscrews 1 and remove the top cover 2.

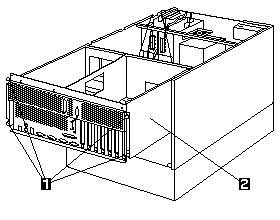
- Loosen the four thumbscrews 1 at the rear of the shuttle.

- Slide the shuttle 2 to the rear of the server.
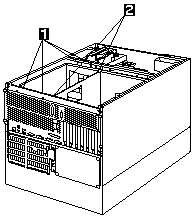
- Disconnect the two cables from the connectors 1 on the processor assembly.
Note:
For easier access to the connectors, you might have
to remove the air diffuser near the fan.
To do this, slide the air diffuser up and off of the clips.
Then, lift it out of the server.
You will be instructed when to replace the funnel later in this procedure.

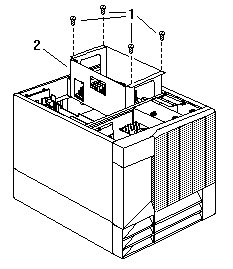
- Remove the four screws 1 securing the processor assembly.
- If the processor assembly has two levers 2 at the
top corners, pull the levers up.

- Lift the processor assembly 2 out of the server and
put it aside. This processor assembly is not used for the upgrade.

Back to 
Please see the LEGAL - Trademark notice.
Feel free - send a  for any BUG on this page found - Thank you.


