Hot-Swap Fan Assembly (Netfinity 7000-M10 - Type 8680)
Hot-Swap Fan Assembly
The server comes with two hot-swap fan assemblies in the front access cover and
two hot-swap fan assemblies behind the hot-swap drive bays.
Notes:
- You do not need to turn off the power to the server to replace a fan assembly.
- Replace a fan assembly that has failed as soon as convenient to maintain the redundant cooling capability.
To replace a hot-swap fan assembly:  - Caution
The power cable to the fan should be disconnected whenever the fan assembly is not installed in the
server, otherwise, the fan might start turning while you are holding it and the fan blades could injure your
fingers.
- Determine which fan assembly you will replace.
- To replace a fan assembly behind the hot-swap drive bays, go to step 2.
- To replace a fan assembly in the front access cover, go to step 6.
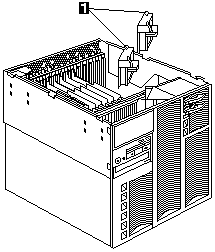
- To replace a fan assembly behind the hot-swap drive bays, remove the top cover
(see 'Removing the Top Cover').

- Pull on the fastener -1- and remove the fan assembly from the server.
- Insert the replacement fan assembly in the server.
Align the bottom edge of the fan assembly with the matching openings in the server chassis.
- When you have the fan assembly correctly seated, press on the fastener to secure the
fan assembly in the server.
Note: The power cable engages and the fan blades begin to spin when you correctly
seat the fan assembly in the chassis.
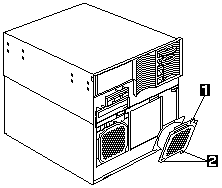
- To replace a fan assembly in the front access cover, remove the front bezel
(see 'Removing the Front Bezel').

- Pull on the fastener and remove the fan assembly -1- from the front access cover.
- Insert the replacement fan assembly in the front access cover.
Align the bottom edge of the fan assembly -2- with the matching openings in the front
access cover.
- When you have the fan assembly correctly seated, press on the fastener to secure the fan assembly.
Note: The power cable engages and the fan blades begin to spin when you correctly
seat the fan assembly.
- If you have other options to install or remove, do so now, otherwise, go to
'Completing the Installation'.
Back to 
Please see the LEGAL - Trademark notice.
Feel free - send a  for any BUG on this page found - Thank you.
 - Caution

