Installing the Server in the Rack Enclosure
Installing the Server in the Rack Enclosure:
In this section, you will use the following parts:
- Four long screws (M6 by 16 mm)
- Two cage nuts
- One cable-management arm
- Cable ties
To install the server into the rack enclosure:
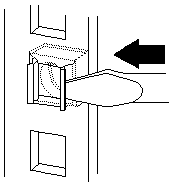
- If you have not done so already, install a cage nut in each front mounting rail in the
marked positions, as shown.
- Position the Netfinity 5000 horizontally, with the 3.5-inch drive bays on the top.
- Align the inner slides on the sides of the server with the slide rails, then, slide
the server onto the outer slide, until the slide rails click into place.
NOTE: When the rack model is fully extended, safety latches on the slide
rails lock into place. This prevents the server from being accidentally pulled out too far
and dropped. To release the safety latch, press in.
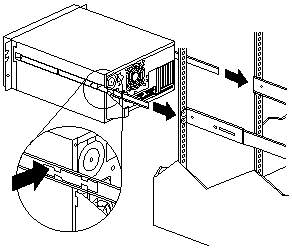
- Press the safety latches and slide the rack model about halfway into the rack enclosure.
- Attach the cable-management arm to the cable-arm bracket, using two long (M6 by 16 mm) screws.
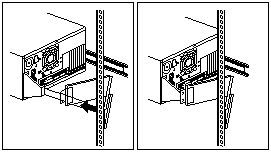
- If you have not done so already, attach the cable-management arm to the rack as described in
step 5a and
step 5b.
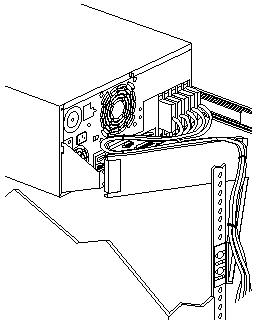
- Attach the monitor, keyboard, and power cables to the corresponding connectors on the server.
Refer to the rack enclosure documentation for instructions.
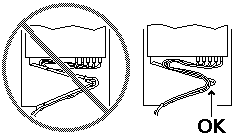
- Attach the cables to the cable-management arm using the cable ties provided.
NOTE: Be sure to route the cables above the top edge or below the bottom edge of the
cable-management arm, to avoid overstressing the cables.
- Secure the rack model in the rack enclosure.
- Slide the rack model into the rack enclosure.
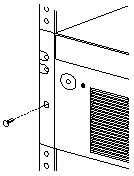
- Secure the server to both sides of the rack enclosure by inserting a long screw (M6 by 16 mm)
through the chassis bracket, mounting rail, and cage nut.
- To complete the installation, refer to the documentation that comes with the rack enclosure.
Back to 
Please see the LEGAL - Trademark notice.
Feel free - send a  for any BUG on this page found - Thank you.