Installing the Rack Model in a Rack Enclosure
Installing the Rack Model in a Rack Enclosure
During this procedure, you must install parts on the rack enclosure and the server.
This process can be divided into three parts:
- Preparing the server
- Preparing the rack enclosure
- Installing the server into the rack enclosure
Before you begin
- Read 'Safety Information' and the safety information in the rack enclosure documentation.
- Turn off the server, if it is on.
- Refer to the rack enclosure documentation for additional information on preparing the rack.
Preparing the Server: In this section, you will use the following parts:
- One cable arm bracket
- The inner slide from two slide bracket assemblies
- 6 pan-head short screws (M4 by 5 mm)
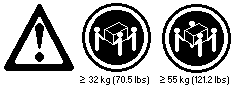
Caution Use safe lifting practices when lifting the machine.
Attention To avoid damage to internal components, use only the
pan-head short screws (M4 by 5 mm) included with the Rack Mount Kit.
To prepare the Netfinity 5000 for installation in a rack enclosure:
- Attach the cable-arm bracket to the rear of the server.
- Remove the two screws at the left of the primary power supply.
- Align the cable-arm bracket with the screw holes, keeping the solid arm of the bracket toward the
side of the server. Make sure the openings in the bracket align with the power supply LEDs and the fan.
- Attach the bracket with the two screws you removed in step 1a.

- Attach the inner slide section of each slide rail to the side of the server.
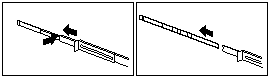
- Pull the inner slide until the safety latch locks.
- Press the safety latch, then, pull the inner slide firmly until it detaches from the outer slide rail.
- Align the holes on the inner slide with the holes on sides of the server, then,
attach the slide with three pan-head short screws (M4 by 5 mm).

Back to 
Please see the LEGAL - Trademark notice.
Feel free - send a  for any BUG on this page found - Thank you.