Installing or Removing Drives in Bays A and B (Removable Media)
Installing or Removing Drives in Bays A and B (Removable Media):
This section gives the procedure for installing a removable-media drive.
If you want to remove a drive, reverse the following steps.
Before you begin
- If you have not done so already, remove the server cover and the front bezel.
See 'Option Installation'.
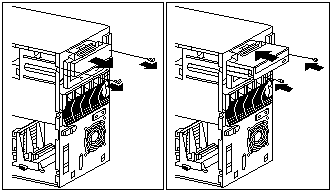
- Remove the bay cover plate, if present.
- Remove the screws on either side of the cover plate that secure the plate to the target bay.
- Remove the cover plate from the server front panel. (Save the cover plate for future use.)

- Using the instructions that come with the drive, together with these instructions, check that any
switches or jumpers on the drive are set correctly. Change the settings if necessary. For information
about termination requirements, see 'Termination Requirements'.
- Position the drive with the connectors facing the rear of the server.
- Slide the drive into the bay until it stops.
- Reinstall and tighten the screws that you removed in (above) step 2.
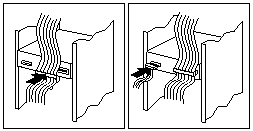
- Connect the drive to the available connector on the SCSI cable or the IDE cable, as appropriate.
NOTE: If you have difficulty connecting a cable, turn the cable connector
over and try again, cable connectors are keyed to connect only one way.

- Connect one of the 4-pin power cables to the drive.
- If you want to install or remove any other options, do so now.
Otherwise, go to 'Completing the Installation'.
Back to 
Please see the LEGAL - Trademark notice.
Feel free - send a  for any BUG on this page found - Thank you.


