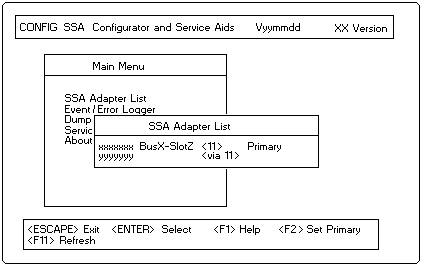
Select or set the primary adapter that is to control the array. The disk drives that you define as members of the array must be connected to this adapter.
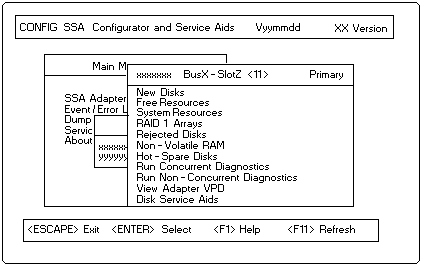
Select the RAID 1 Arrays. You can scroll the contents of the window by using the arrow keys.
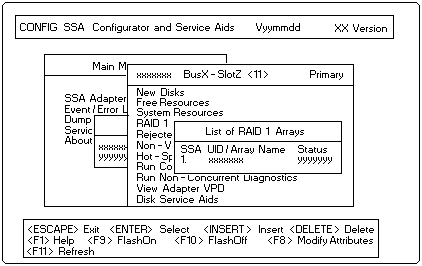
Press Insert.

You must type in a unique array name (of up to 14 characters) for the new array. The default values for the attributes are shown. You can change these values by overtyping them. (The Help screen provides details of the values that are allowed.) Use the arrow keys to scroll the contents of the window, if necessary, to ensure that you check all the attributes. Press Enter to set each attribute in turn.

Select disk drives for the array from the list of candidates, to do this, for each disk drive:
- Press Insert
- A list of candidate disk drives is displayed:
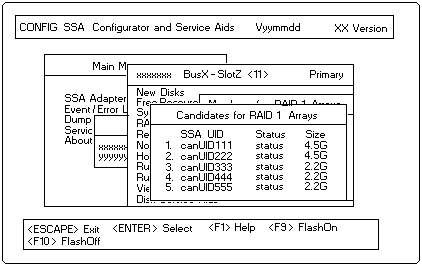
- Select the disk drive that is to be included in the array.
(You can identify the disk drive by highlighting its Unique ID in this list and pressing F9.
This causes the Check light on the disk drive to flash. Pressing FlO stops the light flashing.)
The previous window reappears now showing the selected disk drive as a member of the array.
The screen shown in step 4 reappears now showing the new array in the list.
You can return to the Main Menu by repeatedly pressing Esc.
