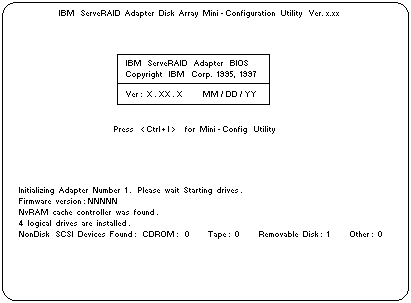
Each time the system starts, the ServeRAID controller performs a power-on self-test (POST). The POST checks the configuration information for the ServeRAID controller and for the configured hard disk drives, to see if any changes have occurred.
- If POST does not detect changes in the configuration or encounter any hardware problems, continue with step 2.
- If POST detects changes in the configuration or encounters a hardware problem, messages appear on the screen. If this occurs, see 'Symptom-to-FRU Index' and correct the problem, then, return here and continue with step 2.

Note: In the precending figure, the version number will be replaced by the verion number of the Mini-Configuration program, the MM/DD/YY will be replaced by the date of the version of the Mini-Configuration program, and NNNNN will be replaced by the version number of the firmware.
 ) or Down Arrow (
  ) key to select the
choice, then, press Enter. Otherwise, the Main Menu
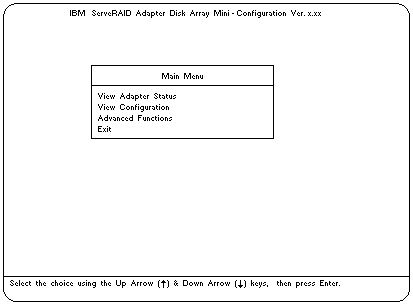
of the Mini-Configuration program appears, similar to
the following screen.

Descriptions of the choices available from the Main Menu are as follows:
- View Adapter Status displays the current status of the ServeRAID controller. (See 'Viewing the ServeRAID II Controller Status'.)
- View Configuration displays the current configuration information for the ServeRAID controller. (See 'Viewing the Configuration'.)
- Advanced Functions lets you initialize the configuration (that is, reset the ServeRAID controller settings to their factory defaults), import the configuration from drives, enable and disable the Boot CD-ROM and INT13 extensions, and view the controller and PCI information. (See 'Using the Advanced Configuration Functions'.)
 ) or Down Arrow (
  ) key to highlight the choice, then, press Enter
