- Open the server front door.
- Turn off the server power.
- Disconnect all external cables and power cords.
- Loosen the two -1- top-cover screws on the back edge of the top cover.
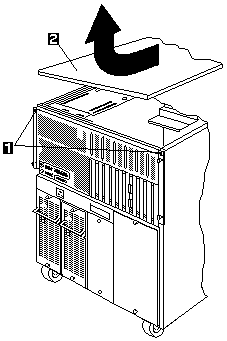
- Slide the top cover -2- sligtly toward the rear of the server, the cover will stop after about 2.5cm (1 inch).
- Lift the cover off the server and set the cover aside.
- Loosen the four shuttle-retention screws on the back side of the server and slide the shuttle toward the backof the server.
For ease of installation, install one repeater at a time.
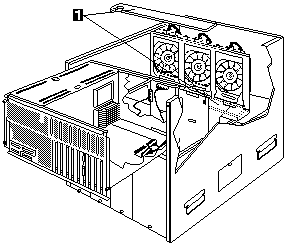
- Remove the air baffle -1-.
- Using long-nosed pliers, unclip the two retention clips -1- holding the SCSI cable on the backplane.
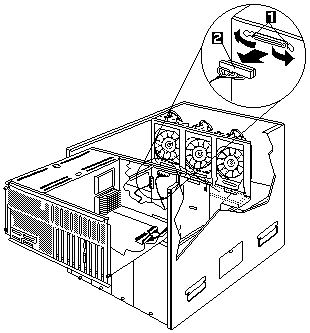
- Disconnect the SCSI cable -3- from the SCSI backplane.
- Disconnect the other end of the SCSI cable from the SCSI controller.
- Plug the repeater adapter -1- onto the backplane.
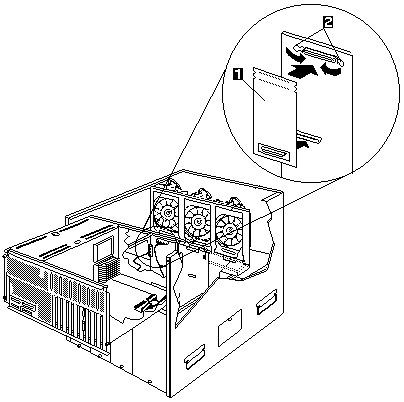
- Using long-nosed pliers, carefully snap the retention clips -2- onto the repeater adapter.
If the server is not being transported, go to step 4.
- Label each hard disk drive with its bank and bay position.
 Important: Be sure to complete this step because you must reinstall
the drives in the same locations. - Remove all the hard disk drives from the SCSI bank.
- Thread the nylon screw through the hole in the back of the SCSI bank and into the repeater adapter standoff.
Do not overtighten the screw.
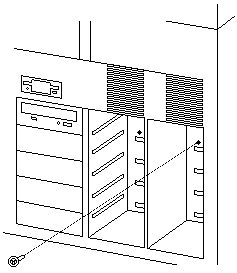
- Reinstall the hard disk drives into the same positions from which they were removed.
Note: The figure shows the SCSI backplanes from the rear of the server.

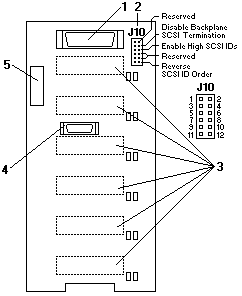
Plug the jumper on pins 5 and 6 to set the SCSI IDs to high, starting from SCSI ID 8 (bay 1, top) to SCSI ID D (bay 6, bottom)


Plug the jumper on pins 3 and 4 to disable termination of the repeater adapter.
- Connect two chaining cable connectors -1- to the two repeater adapters you just installed.
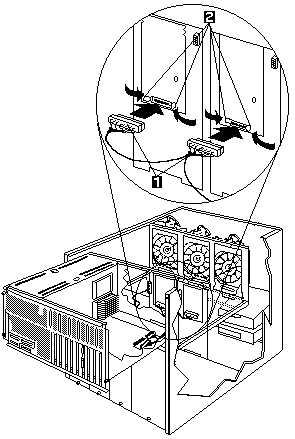
- Using long-nosed pliers, carefully snap the retention clips -2- onto the chaining cable connectors.
- Connect the other end of the chaining cable to the SCSI controller.
 Important: If the air baffle is not installed correctly, the server will overheat.
Make certain that the edges of the air baffle fit inside the shuttle-support rails -2-.
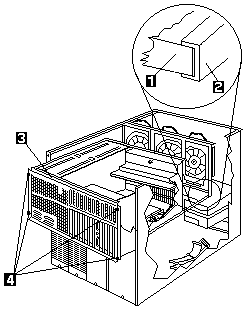
- Replace the top cover and tighten the two top-cover screws -4-.
- Reconnect all the server cables.
- Turn on the server power.
- Close the server front door.
