Installing the Server in the Rack (Netfinity 7000 - 8651)


Installing the Server in the Rack

In this section, you will use eight screws (M4 by 8).

To install the server in the rack:

  1.  Fully extend the slide-bracket assemblies until they lock.
  2.  Remove the side access doors from the server by loosening the captive screws.
  3.  Lift and position the server so that the bayonet slots  on the server are above the bayonets on the slide-bracket assemblies.
  4.  Lower the server and slip the bayonets into the bayonet slots.
  5.  Insert screws through one slide-bracket assembly and  server side. Tighten the screws. Repeat this step for  the other slide-bracket assembly on the opposite side  of the server. This secures the server.

     
  6.  Install the side access doors on the server.

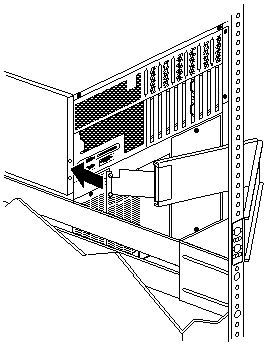
      For proper cooling and airflow, replace the side  access doors before powering on the server.  Operating the server with the side access doors  removed might damage server components.

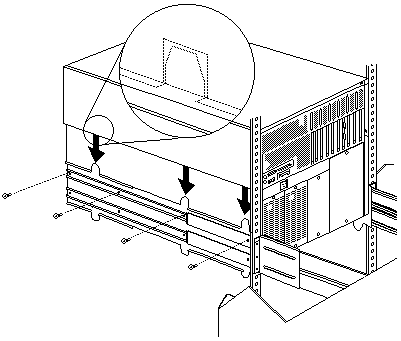
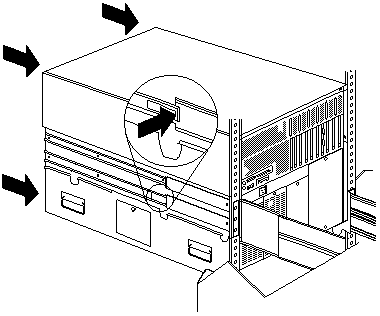
    NOTE: When the drawer is fully extended, safety latches  on the slide-brackets lock into place. To release  the safety latch, press the latch on each side of the rack.

  7.  Press the safety latches and slide the drawer about  halfway into the rack.

     
  8.  Attach the cable-management arm to the server using the captive screws.

     
  9.  Attach the monitor, keyboard, and power cables to  the corresponding connectors on the server. Refer to  the rack documentation for instructions.
  10.  Attach the cables to the cable-management arm using cable ties.
  11.  Secure the drawer in the rack:

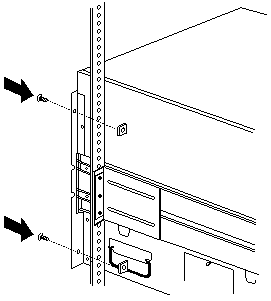
    1.  Attach two cage nuts to the front mounting rail.
    2.  Slide the drawer into the rack.
    3.  Secure the server to both sides of the rack by  inserting screws (M6 by 16 mm) through the  bezel brackets, mounting rails, and cage nuts.

  12.  Install the rack front door.
  13.  To complete the installation, refer to the documentation that came with the rack.


Back to  Jump to TOP-of-PAGE

Please see the LEGAL  -  Trademark notice.
Feel free - send a Email-NOTE  for any BUG on this page found - Thank you.