| Step | Size (quantity) | Memo (torque) |
|---|---|---|
| 6 | M2.5x6 mm (3) | Nylon coating (4kgcm) |
| 7 | M2.5x8 mm (4) | Nylon coating (4kgcm) |
| 9 | M2.5x4 mm (2) | Nylon coating (4kgcm) |
NOTE: Do not reuse (see Screw Kit - FRU P/N) a screw you removed. Use a new screw and
tighten the screw to the torque specification shown.
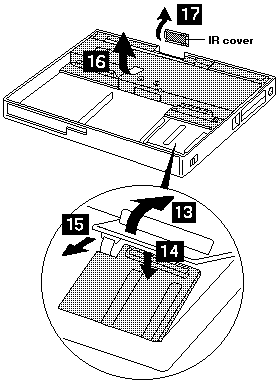
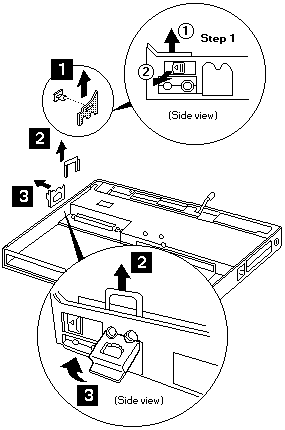
12 Move the IR unit in its location and make it free to disconnect the DIMM adapter
card connector easily.
NOTE: Raise the system board assembly a bit 13 to disconnect
the DIMM adapter card in step 14, the remove the DIMM adapter.
Be careful not to damage the IR flexible cable under the DIMM adapter card. Then remove
the IR flexible cable in step 15.

When replacing: Make sure that the connector of the DIMM adapter card is
connected firmly. Loose or wrong connection cause a memory error.
Back to
Please see the LEGAL - Trademark notice.
Feel free - send a  for any BUG on this page found - Thank you.

