| Step | Length (Quantity) | Memo |
|---|---|---|
| 2 | M2.5 x 6 mm (2) | |
| 3 | M2 x 5 mm (2) |
NOTE:
Make sure you use the correct screw when replacing.
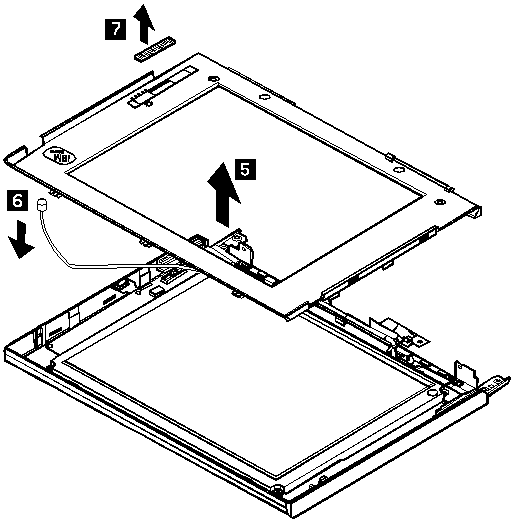
Lift the LCD front cover, then remove the microphone cable.

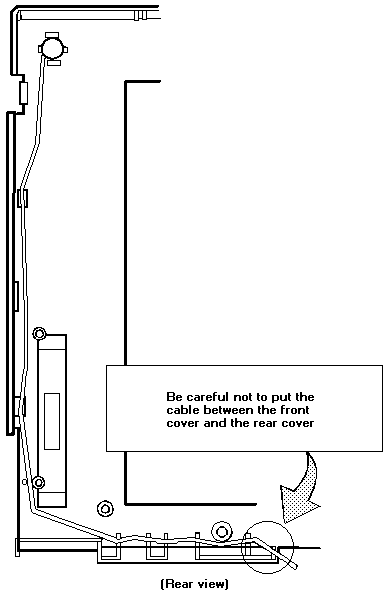
NOTE: When replacing
Position the microphone cable as shown.

1104B LCD Panel
- LCD Cover (1104A)
NOTE: Be careful not to scratch or soil the surface of the LCD panel when replacing it.

Please see the LEGAL - Trademark notice.
Step
Length (Quantity)
Memo
1
M2 x 4.3 mm (2)
NOTE:
Make sure you use the correct screw when replacing.
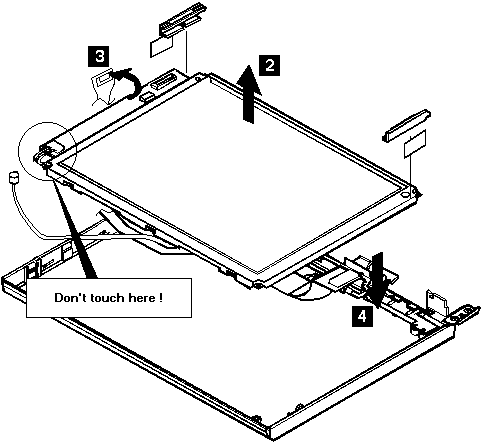
Lift the LCD panel a bit 2, then
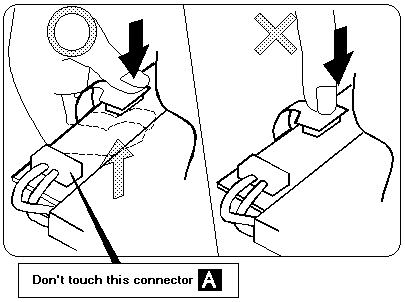
disconnect the flexible cable 3 and 4.


A loose or incorrect connection of the
connector can cause a serious problem.

1104C Interface Cable Assembly, Hinges
1, 2 When replacing the interface cable assembly
3, 4 When replacing the hinges

Step
Length (Quantity)
Memo
1, 3
M2.5 x 4 mm (3)
NOTE:
Make sure you use the correct screw when replacing.
When replacing
Don't locate the core under the LCD panel.
Back to ![]()
Feel free - send a  for any BUG on this page found - Thank you.
