
Please see the LEGAL - Trademark notice.
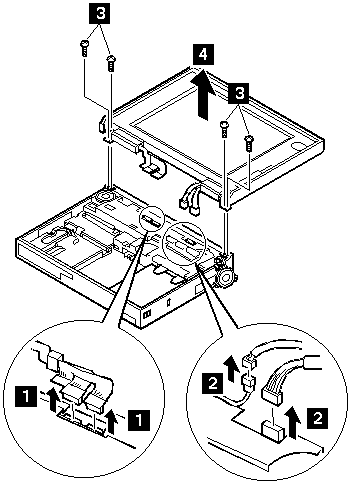
Step
Location (Quantity)
Length
3
LCD hinge (4)
4 mm
NOTE: Make sure you use the correct screw. Screw Size Chart
To Clean the LCD
Gently wipe the LCD with a dry, soft cloth.
Do not use alcohol or detergent to clean the LCD.
To avoid damaging the LCD,
do not scratch or apply any force to its surface.
 please READ - see
Back to ![]()
Feel free - send a  for any BUG on this page found - Thank you.