Creating Joint Bodies

A joint body is a set of welds. This entity is located in the specification tree. When creating a weld, you need to specify the joint body under which you will put your weld.

A Joint body is attached to a joint.

This task shows how to create a joint body.

Open the Weld.CATProduct document and create "New Joint" as explained in Creating a Joint.
1.  Click the Joint Body icon .

2.  Select "New Joint" as the joint to which your joint body is to be attached.

The dialog box that appears displays  "Joint Body.1" as the default name for the joint body, and the name of the selected joint.
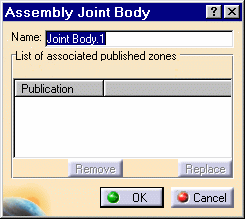
3. Give a new name for the Assembly Joint: "New Joint Body" for example.
Optionally, you can associate joint bodies to published geometric elements belonging to the components of the selected joint. This is a way of restricting the geometry available for creating welds. 

For example, if you decide to use one edge of Blue Part for creating a weld, ensure that this edge is published, then select it in the geometry: its name appears in the Publication field of the Assembly Joint Body dialog box. 


4.  Click OK to confirm.

The joint body "New Joint Body" is displayed in the specification tree.

You can modify joint bodies at any time.