 |
A joint is a set of two or more
components which geometry is used for creating welds.
This task shows how to create then edit an
assembly joint. |
 |
Open the Weld.CATProduct
document. |

|
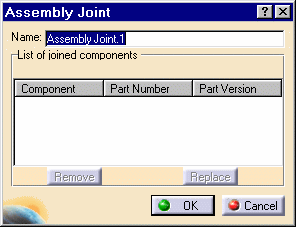
1. |
Click the Joint icon
 . .
The Assembly Joint dialog box is displayed. |
|
|
|
|
2. |
Give a new name for the Assembly Joint: "New
Joint" for example. |
|
3. |
Select "Green Part" as the first part. |
|
4. |
Select "Blue Part" as the
second part. The list displays the name of these components as well as
their part number. The Part Version field shows possible revision numbers. |
|
5. |
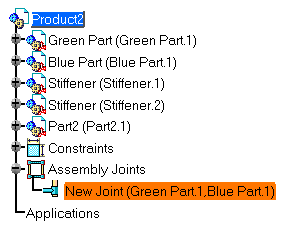
Click OK to confirm.
"New Joint" appears as an entity below the Assembly Joints node. The
name of the parts it comprises are indicated in parentheses. |
|
|
|
|
|
To
edit the joint: |
|
6. |
Double-click "New Joint". The
Assembly Joint dialog box displays. |
|
7. |
Select "Blue Part" then click the Replace button |
|
8. |
Select any of the stiffeners as the replacing
part, then click OK.
The tree reflects the change. |
|
|
 |
|
|
To remove a part from the list, simply select
the desired part then click the Remove button. |
 |