Every object that you create (except a run), or part that you place, in your design document can be given a unique identifier. This identifier usually consists of a prefix that identifies the type of object or part it is, followed by a unique number. This enables users, for instance, to maintain a history of each part - when it was serviced, or repaired or replaced - and schedule servicing and replacement dates. When you create an object or place a part in your document the application will suggest a name for it - the default name. (In many cases you have the option of rejecting this name and entering a different name, or renaming it.) The default name is based on certain rules. A set of default rules is included with this application, but most users will want to modify these rules to suit their own requirements. You can modify or define the naming rules in the following way:
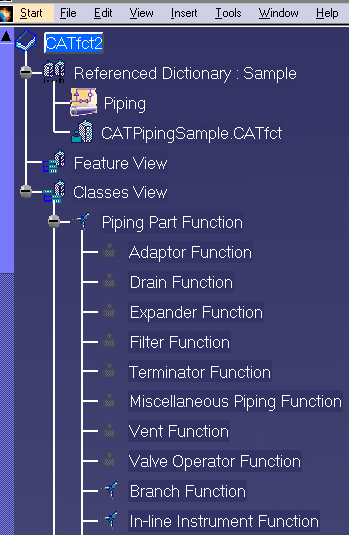

If the class does not have object naming rules defined then the Inherited From field will indicate the parent from which they are derived. If the class has rules defined then the same class name will display, as in the image above. If no rules exist for this class then they will be created when you take the following steps.
The naming rules you define using the Reference option are used by the application when you build a component for placing in a catalog. Most users will define naming rules for an object using both options. Depending on your needs, you can choose to simplify the procedure by defining rules for the parent function, which is Piping Part Function in the example above, and these rules will be inherited by all the objects under it.
Select Yes or No for Sequence number. Yes or No cannot be selected if you have Reference as the ID usage. Minimum length refers to the number of digits in the numbering scheme. For instance, 3 means the number will show up as 001.
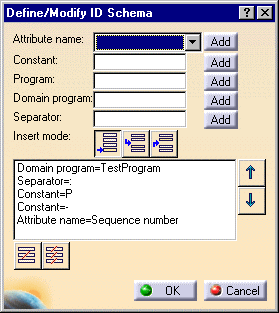
Click Add after entering or selecting a value in a field. You can choose to have more than one attribute value displayed in a name, for instance when you want to add a Separator at more than one place. Click Add after selecting each one.
You can select the order in which the values will appear in a name by using the Up or Down arrows or the buttons in the Insert mode field.
If you want to use computed attributes in the object name then see Add Computed Attribute to Object Name.
 . If you select Nominal
size, for instance, the object name will display the nominal size of
the object. These attributes are for the Piping Part class only - other
classes will have different attributes displayed. You can display more than
one attribute in the name.
. If you select Nominal
size, for instance, the object name will display the nominal size of
the object. These attributes are for the Piping Part class only - other
classes will have different attributes displayed. You can display more than
one attribute in the name.The following list shows the programs provided with the application as a sample, and the attributes they refer to:
- CATPspEncRating - Encoded Rating
- CATPspEncRating2 - Encoded Rating2
- CATPspEncRating3 - Encoded Rating3
- CATPspEncRating4 - Encoded Rating4
- CATPspEncNominalSize - Encoded Nominal Size
- CATPspEncNominalSize2 - Encoded Nominal Size2
- CATPspEncNominalSize3 - Encoded Nominal Size3
- CATPspEncNominalSize4 - Encoded Nominal Size4
- CATPspEncSchedule - Encoded Schedule
- CATPspEncMaterialCategory - Encoded MaterialCategory
- CATPspEncMaterialCode - Encoded MaterialCode
FOR HVAC DUCTS
If you want to place 'heavy' HVAC ducts then you need to change the file that defines the object naming rules. (You do not need to make any change if you are placing 'light' parts.) If you are placing heavy parts then navigate to the directory ...intel_a\startup\EquipmentAndSystems\HVAC\DataDictionary. The default files are named sch-CATHvaHVACXXXXDuct1.xml where XXXX represents a shape like FlatOval. Rename this file so that the application does not recognize it - you can add a SAVE at the end, for instance. You need to use the corresponding file that has the _HV at the end of the file name. This file is in the same directory, and normally directly beneath the file for light parts. To use this file simply remove the _HV. As an example:
- Rename sch-CATHvaHVACXXXXDuct1.xml to sch-CATHvaHVACFlatOvalDuct1_SAVE.xml
- Remove the _HV from the file sch-CATHvaHVACFlatOvalDuct1_HV.xml
![]()