Generating a Report
|
|
This task explains how to generate
a report listing values of selected properties. Before you do this you need
to define the report format.
Examples from the Piping Design workbench are used here. Substitute the appropriate resource or directory when working in another workbench. |
|
|
|
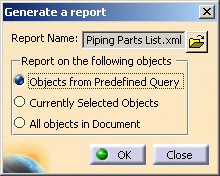
1. | Click Tools - Report - Generate.
The Generate Report dialog box displays.
|
| 2. | Click the Open button and select the report format you want to use, in this case Piping Parts List.xml. | |
| 3. | If you had defined a query in your report format then check Objects From Predefined Query. | |
| 4. | If you select one or more objects in the document then check the option Currently Selected Objects. | |
| 5. | Check All Objects in Document if you want a report on all objects in your document. | |
| 6. | Click OK and
select a format, such as HTML, when you are
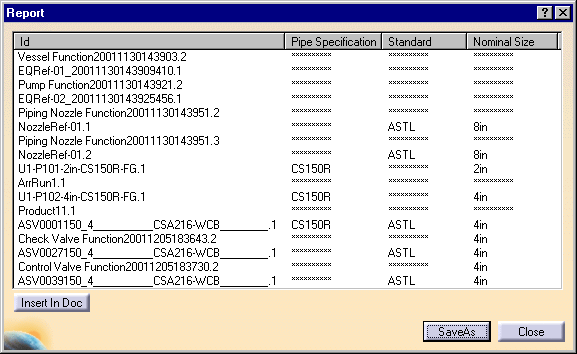
prompted. The report will be generated. It shows values for all properties
defined in your report format for all objects in the document that have
them. Where an object does not have a property the report displays
asterisks.
|
|
| 7. | Click Insert in Doc if you want to display these values in your document. To generate the report from a schematic and insert it in a schematic, click on the Insert in Doc button and click anywhere in your drawing. To generate the report from a 3-D document and insert it in a drafting document, click on the Insert in Doc button and select the sheet or view in the specifications tree. Do not select a point in the sheet. The XY Coord dialog box will pop up - enter the location where you want to insert the report. The data will be placed at the location. It can be moved to another location later by click and drag. | |
| 8. | Click Save As to save the report. Specify a file name and location. | |
|
|
NOTE: If you have several instances of the same CATPart in your document, and the query finds geometrical data that is embedded in the reference CATPart (e.g. user parameters, geometric sets), then the data will be reported on only once in the report. |
|
![]()