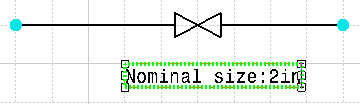
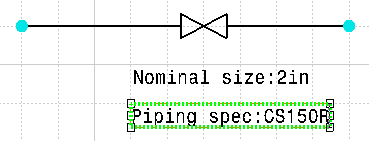
When you create an annotation with an attribute link, you are associating the annotation in the diagram with one or more attributes or properties of the component. When the value of a linked attribute is changed the annotation is updated automatically.
If you create the attribute link on a placed component, the value in the annotation will change whenever the attribute value of the reference component changes.
You can also add the annotation to a reference component, in which case it will display on all placed components (you can create additional annotations on the placed component). In this case, placed components will inherit attribute values from the reference component. If you want each placed component to have unique values, derived from the design document in which it is placed, then you must take an additional step. Right click on the text in the reference component (as shown in Step 3 or 4 below) and, in the drop down menu that displays, select Modifiable in Instance. See Editing Annotation on a Placed Component for more information.

- If you place an annotation on an instance, with an attribute link that points to an attribute on the reference component (or object), and
- When you delete that instance, the annotation will not be deleted, unless
- It is the last instance of a component in the design document. If it is the last instance of a component then the annotation will also be deleted. If it is the last instance of a route it will not be deleted.
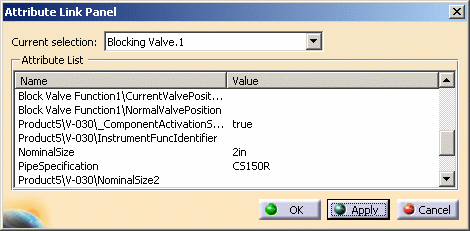
To help you recognize an attribute on a reference component: In Step 2 above, all attributes that are preceded by the words Block Valve Function1 are attributes of the reference component. All others are attributes of the instance.