Creating Connectors on Light Parts
|
|
This task shows you how to create connectors on light parts. | |
|
|
Light parts are so called because
they do not have geometry that you can select for the purpose of creating
parts, nor can you create any. Therefore, the process is somewhat
different. You cannot use the Build Connector command to create connectors on light parts. If you do, the following message will display in the Manage Connectors dialog box: Connector cannot be modified on standard part. You must use the Define Connectors command in the Create Part dialog box. |
|
|
|
1. | With your part displayed, click the
Build Part button
|
| 2. | Click the Define Connectors button
|
|
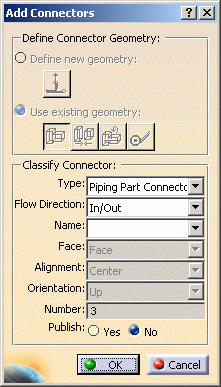
| 3. | Click the Add button to display the
Add Connectors dialog box.
All options in the Define Connector Geometry area are grayed out because light parts cannot have the geometry needed to create connectors. |
|
| 4. | Make selections in the Classify Connector area, as explained in Step 5 of Create Connectors. Some options are grayed out because they are preselected based on the type of light part. | |
| 5. | When you are finished, click OK. The connector is created. You should note that connector geometry is not visible on light parts. Also, the location of the connector does not need to be specified - the connector only needs to be created on the part. The application will select the appropriate location for the connector when you are placing the light part. | |
|
|
||