Building Equipment Using Multi-Discipline Connectors
|
|
This task explains how to create
multi-discipline equipment using connectors and connector attributes,
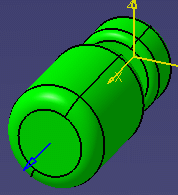
enabling you to route directly from the connectors. You can have a self-contained CATPart containing both the equipment attributes and the attributes of other disciplines (such as Piping and HVAC). You do this by adding the attributes of the other disciplines directly to the equipment class. |
|
|
|
With multi-discipline equipment, you can
place connectors from other disciplines (such as Piping or HVAC) on
equipment. You do this by adding Piping-specific and HVAC-specific
attributes on the same equipment. These Piping and HVAC attributes allow
the routing as well as the parts placement engine to perform the required
compatibility checking and catalog selection. During parts placement, only
Piping parts can be placed on the Piping connectors, and only HVAC parts
can be placed on the HVAC connectors. Multi-discipline attributes must be unique when defined on the equipment, and the names of the files containing the discrete values for these attributes must be unique. Additionally, you can only add multi-discipline attributes to equipment classes defined in the FEAT file. And there is only one part number for the entire equipment. |
|
|
|
The following explains how to define a CATPart
containing Equipment attributes, and Piping and HVAC attributes.
Follow the same procedure to add attributes of other disciplines to the Equipment class to create multi-discipline equipment. |
|
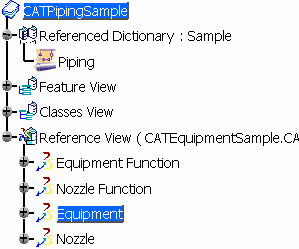
| 1. | Open the Piping CATfct file. Select File - Open
from the menu bar and navigate to the Piping CATfct file. (Make sure you
have write permission for the CATfct file.) Click the Open
Reference Dictionary button
Select the Equipment class. You can only add attributes to classes from
the FEAT file, identified by the DS symbol
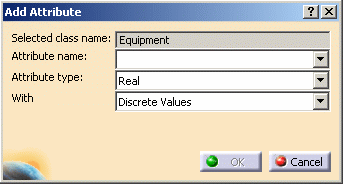
This references Piping attributes to the Equipment class, enabling the Equipment CatPart to contain both the Equipment and Piping attributes. To add Piping attributes to the Equipment class, click the Add
Attribute button
Use the Add Attribute dialog box to add all the necessary Piping attributes. The attribute information displays in the Local Attribute frame. Use the following naming convention to define an attribute name: <Discipline attribute name><Positive number><A suffix representing the discipline> As an example, name Piping End Style attributes as follows: EndStyle1PIPE, EndStyle2PIPE. Save the Piping CATfct file. Even though you are adding attributes to the Equipment class, the actual change is made in the Piping CATfct file. The Equipment class is copied to the Piping CATfct file, and all the required Piping attributes are defined in the Equipment class. |
|
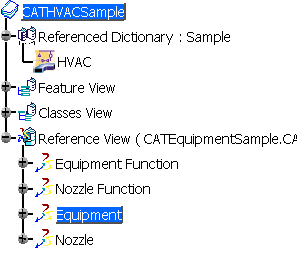
| 2. | Open the HVAC CATfct file and follow the above procedure
to add HVAC attributes to the Equipment
class. Click the Open Reference Dictionary button, select the Equipment CATfct file, and select the Equipment class. This references HVAC attributes to the Equipment class, enabling the Equipment CATPart to contain both the Equipment and HVAC attributes.
Use the Add Attribute dialog box to add all the necessary HVAC attributes. The attribute information displays in the Local Attribute frame. Use the following naming convention to define an attribute name: <Discipline attribute name><Positive number><A suffix representing the discipline> As an example, name HVAC End Style attributes as follows: EndStyle1HVAC, EndStyle2HVAC. Save the HVAC CATfct file. Even though you are adding attributes to the Equipment class, the actual change is made in the HVAC CATfct file. The Equipment class is copied to the HVAC CATfct file, and all the required HVAC attributes are defined in the Equipment class. See Feature Dictionary documentation if you need to learn more about the steps explained above. Specifically, see the following: Opening a Reference Dictionary and Adding Attributes to an Object Class. |
|
| 3. | Add the attributes you just added to the Equipment class
to the Equipment Arrangement Connector Attributes file. This is
a text file that is located in the directory ...intel_a\startup\EquipmentandSystems\Equipment\General\EquipmentArrangement\ComponentCatalogs. Use a text editor like Notepad. If the attribute you added already exists in the Connector Attributes file, do not add it again. Also, do not add a prefix or suffix. As an example, if the EndStyle exists in the file, do not add PIP or HVAC to it. Make sure that this file and its location are correctly identified in the Project Resource Management file. See Associate Attributes to a Connector for more information about this file. |
|
| 4. | Add connectors to the equipment. Make sure the connectors
are of the same type as the discipline in which you want to use the
equipment (in this case, Piping and HVAC). See Create a Part with
Specified Type and the Connectors section for more information.
|
|
| 5. | Select the equipment and then select Edit - Properties in the Create Part dialog box to open the Properties dialog box. Select the Piping tab (or any other application whose attribute you want to add value to) to see the attributes available to you. In this example it is End Style. Click on the down arrow next to the field to select a value, for example, Butt Weld. See Edit or Display Properties of an Object for more information. | |
| 6. | You now need to associate these attributes to a connector.
This provides the application with essential information for the part
placement function, and is explained in the task Associating Attributes
to Connectors.
Briefly, when you associate an attribute to a connector, the connector inherits the value too, if any was assigned. So if you associate the attribute end style, which has a value of butt weld, the value is also associated. |
|
| 7. | Repeat the process described above to add other types of connectors )such as HVAC). | |
| 8. | Add the equipment CATPart to the Equipment Arrangement catalog. Now when you place it, the attributes and values you added from other applications are recognized by them. If, for instance, you are in the Piping application and want to route from it, the application selects the correct size as well as other attribute values. | |
![]()


