Such scripts can be:
- attached to events in SmarTeam and be triggered before, after or instead of the action concerned
- placed in the Graphic User Interface (GUI):
- by default, in the Tools > User Defined Tools menu item
- anywhere in the GUI by means of the Menu Editor.
You can also launch as many as ten SmarTeam scripts from a CATIA session using the ten associated commands. There are already six sample scripts delivered in the form of ready-to-run samples (see the List of Sample Scripts below). These scripts as well as any others you decide to write must be assigned to one of the ten associated commands. You then only have to place the corresponding commands where it suits you best in the GUI.
This task is made up of the following stages:
Defining the SmarTeam Scripts to be Accessed from the CATIA Session
-
Run a CATIA session.
-
Select Tools > Options....
The Options dialog box appears with the category tree in the left-hand column. -
In the General category of the Options tree, select Compatibility.
-
Click on the SmarTeam Scripts tab.
Make sure you are connected to SmarTeam before accessing the Options dialog box.
Otherwise, an error message will appear prompting you to do so.
-
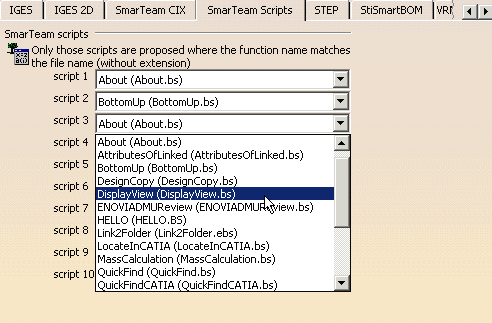
In the fields containing the command you want to use, open the combo box to display the list of scripts and select one of the scripts in the list to assign it to the command. In this way, you can associate one of ten scripts with each of the ten commands available:
-
Click OK to confirm.
Placing the Commands in the CATIA Graphic User Interface
-
Select Tools > Customize... or View > Toolbars > Customize...
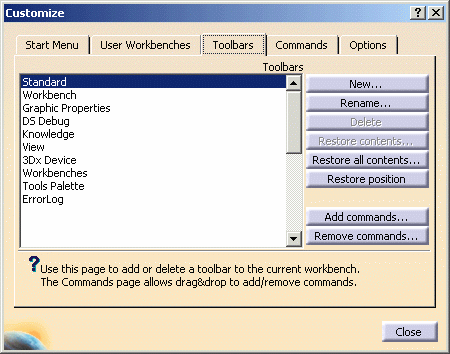
The Customize dialog box appears. -
Select the Toolbars tab:
-
Click on the New... button to create a new toolbar (see "Managing User-Defined Toolbars" in the CATIA - Infrastructure User's Guide).
-
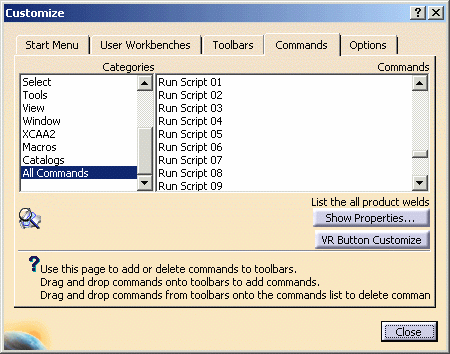
Click on the Commands tab and select the All Commands category on the left-hand side of the dialog box.
-
From the Commands list, find the ten SmarTeam commands:
-
Drag and drop the command(s) onto the toolbar you just created.
For more information on toolbar customization, see "Customizing a Toolbar by Dragging and Dropping" in the CATIA - Infrastructure User's Guide.
List of Sample Scripts
|