In both cases, you can choose between two ways of accessing the documents of interest. A default behavior just need to have been set before using the commands.
Inserting a Component
-
Display an assembly structure in CATIA.
-
Click the Insert Component icon
 .
.
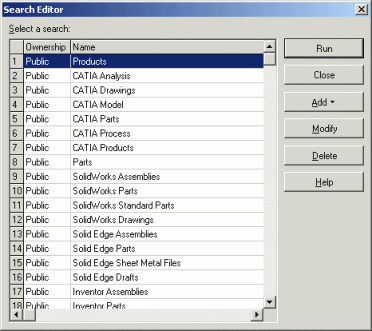
Alternatively, right-click and select Assembly Management>Insert Component.The Search Editor window is displayed, as shown below:

-
Choose a search.
-
Click Modify.
-
In the Profile Card enter relevant criteria.
-
Click Run to confirm the search.
-
In the displayed dialog box, choose a document.
-
Click OK.
The document is inserted into the assembly structure.
Alternate Method
From V5R17 onwards, it is possible to choose between opening
the Search Editor dialog box as described above,
or the Insert Components dialog box when using Insert Component
![]() .
.
Using the Insert Components dialog box enables you to run a quick search according to different fields: ID, Revision, Description, File Name, Directory etc. This dialog box is similar to Open document dialog box.
Whatever chosen method, the default behavior is customized thru the Documents Environments options. For more information, see Enabling the Display of the SmarTeam File>Open User Interface.
Replacing a Component
-
Perform the same steps as for component insertion described above but this time select SmarTeam>Assembly Management>Replace Component...
As for inserting components, you can choose between using the Search Editor or Replace Component dialog box.