Creating a Role
You need to create a role for which you will then assign some authorizations.
-
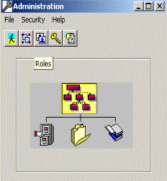
From the SmarTeam User Maintenance tool, display the Administration dialog box to access the command for creating roles.
-
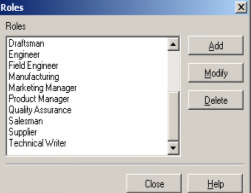
Click the role icon to display the Roles dialog box:
-
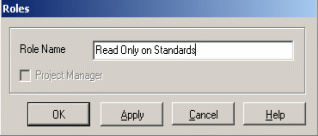
Create the role of interest. For example, name it as "Read Only on Standards".
For more information on defining roles, see the SmarTeam Editor Administration Guide.
Creating a Project |
Create a project on which you will restrict design engineers authorizations. Attaching documents to projects is a good way of sharing and controlling these documents.
-
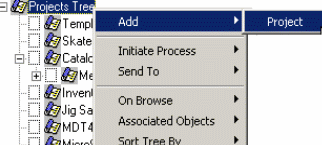
Add a project to which standard sheet metal tables will be linked.
Assigning Authorizations |
You need to assign authorizations for design engineers.
-
Define appropriate authorizations for the Read Only on Standards role, including:
- View Object on project
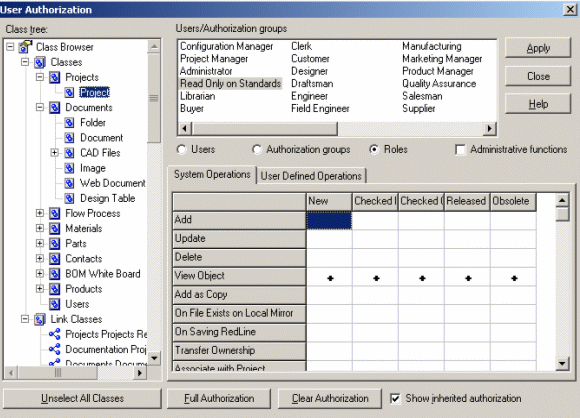
-
View Object, View, Print, On Viewer and Copy File only for Design Tables:
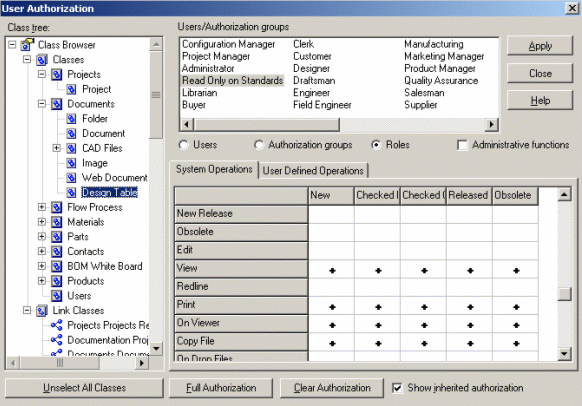
-
View Object, on Projects Projects, Documentation Projects and Documents Documents relations
Assigning a Specific Role to Design Engineers for the Project
-
Use the Project Security command to set the project specific for bend tables as Restricted.
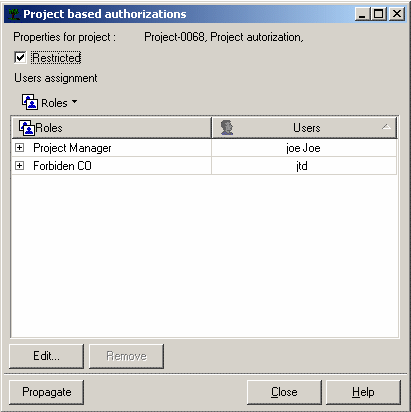
-
Click Edit... to apply the Read Only on Standards local role to all designers who need to have read access to the bend tables.
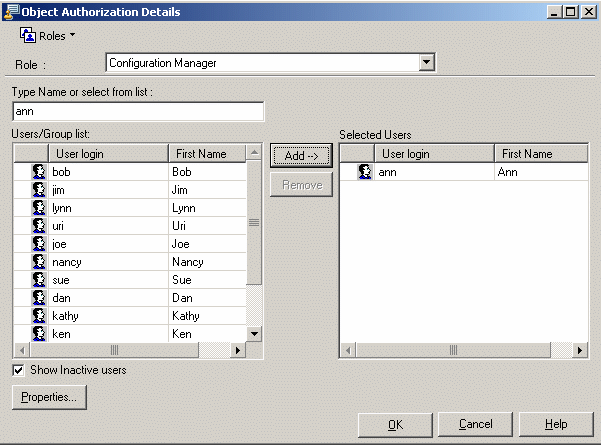
See the SmarTeam Editor Administration Guide for further information.
Saving Bend Tables inside SmarTeam |
-
Save the bend tables in the "Design Table" class.
-
Link the bend tables to the "Sheet metal Bend Tables" project.
Releasing Bend Tables Inside SmarTeam |
-
Release the bend tables.
This is optional: Keeping them as checked-in documents should be sufficient.
The Release operation automatically releases all documents.
Associating the Bend Tables to the Project |
-
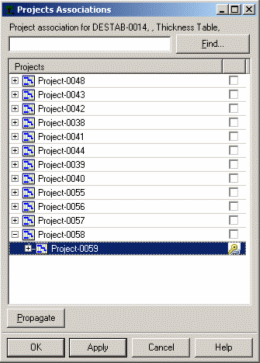
To secure the bend tables thru the "Sheet metal Bend Tables" project, associate the bend tables to the project. To do so, use Associate with project.
Setting Up a Shared Directory for CATIA Bend Tables |
Sheet metal bend tables being meant to be widely used, a good way to dispatch them is to place them in a shared directory.
-
Set up a shared directory folder as default.
A shared directory is just a directory on a server accessible to everybody. To keep this shared directory clean and secured, it is strongly recommended to assign the Windows permissions as below:- The administrator has administration rights
- Users are assigned read-only rights.
Copying the Bend Tables into the Shared Directory |
Copying the Bend Tables into the shared directory is the final step you need to do.
-
Search for your bend tables in SmarTeam.
-
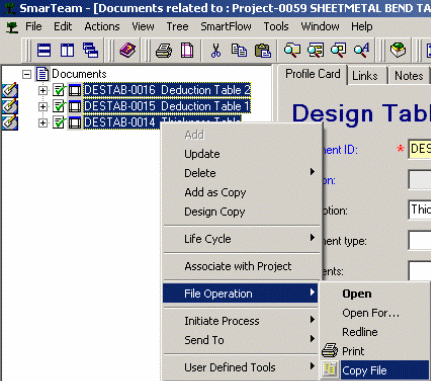
Multi-select the tables to be copied.
-
Right-click and select File Operation > Copy File.
-
Paste the files into the shared directory.
The administrator's work is now complete: the bend tables are in the electronic vault and the shared directory contains a copy of them. Design engineers can then access Sheet Metal Bend Tables to design sheet metal parts.
See the SmarTeam Editor Administration Guide for further information.