Creating Plates

This task shows you how to create and place two plates.

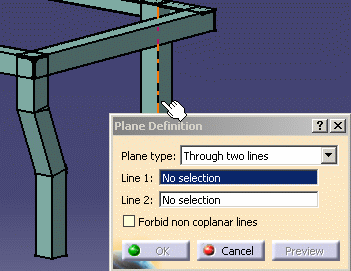
Plates are positioned with respect to existing structures and the plate contour is sketched. First, however, you must define the planes on which you will create the plates. You can continue to create construction geometry in the same part.

1. Activate the part containing the construction geometry, then insert a new geometrical set (Insert -> Geometrical set).

The Wireframe and Surface Design workbench opens.

  Don't forget to work without links when creating construction geometry.
  2. Double-click the Plane icon.

The Plane Definition dialog box appears.

3. Set Plane type to Through two lines.
4. Select an edge on the first shape.
   
  5. Select an edge on the second shape, then click OK in the dialog box.

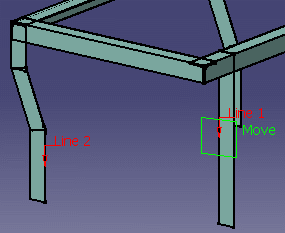
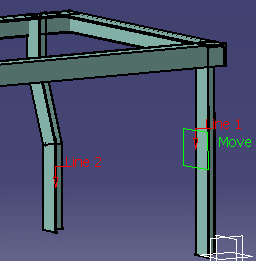
The first plane is created.

  6. Define the other plane you need.
  7. Click the Plane icon again when done and reset links with selected objects.
  8. Double-click the root product to return to the Structure Design workbench.
  9. Click the Plate icon.

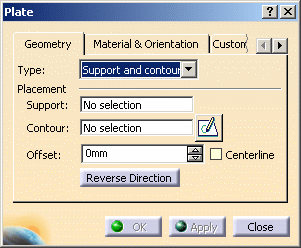
The Plate dialog box appears.

  10. Set Type to Support and contour, then select one of the planes just created as support.
  11. NOTE: For the purposes of this simplified exercise, you do not need to make any of the other selections. The other functions are described more fully in Creating Shapes.
  12. Define the plate contour:
  • Click the Sketcher icon opposite the Contour field.
    The Sketcher workbench opens.
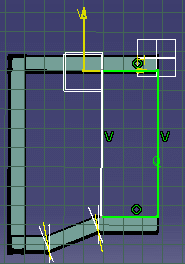
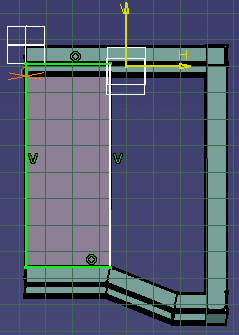
   
  • Click the Rectangle icon and sketch the plate contour.
  • Constrain the sketch to correctly position the plate.
  • Click the Exit Workbench icon to return to the Structure Design workbench.

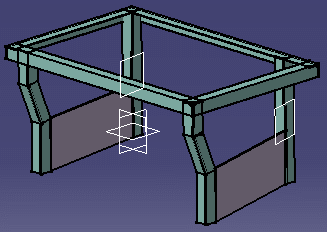
The system previews the plate.

  13. Click OK in the Plate dialog box to create the plate.
   
  14. Repeat to create the second plate.
   
  15. Click the Plane icon when done.