These bends can be created on non-connex walls, and with a constant radius value.
-
Click Bend
 .
The Bend Definition dialog box is displayed.
.
The Bend Definition dialog box is displayed.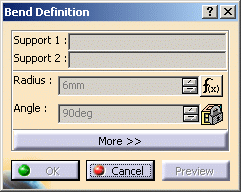

Note that the Radius field is grayed out because it is driven by a formula when editing the sheetmetal parameters: at that time, you cannot modify the value. -
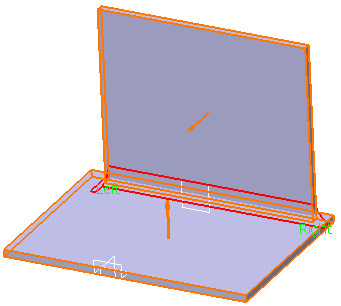
Select Support 1 and Support 2 in the specification tree or in the geometry area. The two supports must be connected by the edge of their internal faces.
-
Right-click the Radius field and select Formula -> Deactivate from the contextual menu to change the value.
You can set the Radius value to 0. -
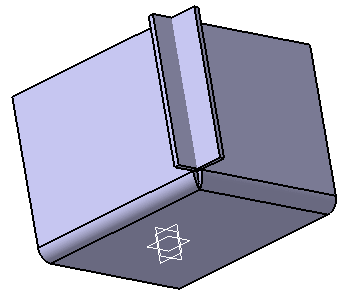
Enter 4mm for the radius and click Preview. The bend is previewed, along with its orientation symbolized by arrows.

-
Click the More>> button to display additional options:
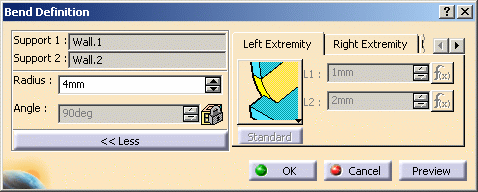
You can define: - the left and right extremity settings (see also extremities definition settings)
- and the bend allowance settings.
-
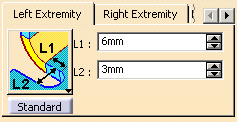
Click the Left Extremity tab, and choose the Mini with round relief bend extremity type.
-
Then, deactivate the L1 and L2 length formulas (as previously explained in step 3), and set them to 6mm and 3mm respectively.
-
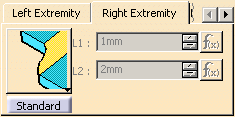
Click the Right Extremity tab, and choose the Curved shape type.
-
Click Preview to visualize the left and right extremities.
-
Click OK in the Bend Definition dialog box.
The bend (identified as Cylindrical Bend) is created with the specified extremity types and is added to the specification tree. 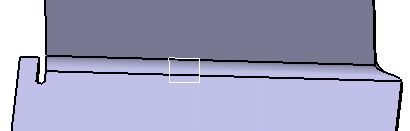
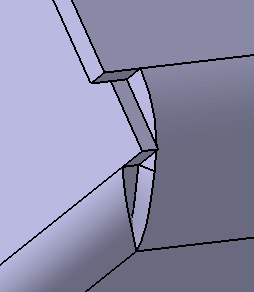
- The extremities and the corner relief defined with the current dialog box will apply locally and prevail over any other global definition.
- Be careful when creating bends with square or
round relief. Depending on the geometry configuration, this
can lead to removing more matter than you would expect. Indeed, a
corner relief being computed on the whole intersection of the
elements involved (bends or bend/wall), in the following
configuration, the matter is removed till the end of the wall.
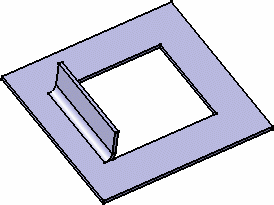
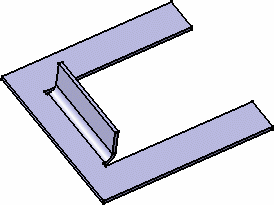
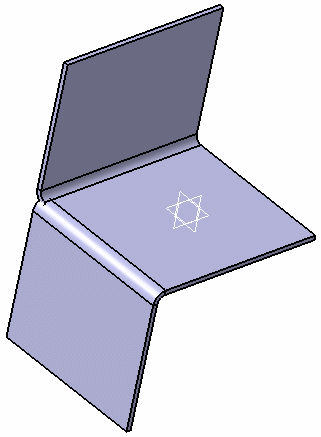
Bend with no relief
Bend with square relief
In this case, it is best to replace the bend corner relieves with cutouts (identified in red in the figure below) that will act as corner relieves removing matter to the part. 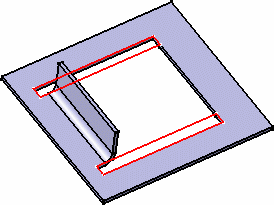
You can create bends with closed extremities on walls. 
If you want to create a close bend, be aware that: - a closed bend cannot be built with a null radius. If you try to, a warning is issued and the bend creation fails;
- a closed bend cannot be built if there is no intersection with another bend, for instance if a bend is created on an inverted wall. A warning is issued and a maximum extremity is built instead;
- the bends' supporting walls are not trimmed.
- In case the intersection between the bends of the supporting walls is too short, a tangency extrapolation is computed.
Creating a Bend on a Flange or a Stamp
Let's take an example with a surface stamp.
-
Click Bend
.
The Bend Definition dialog box is displayed. -
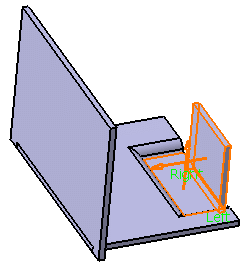
Select the surface stamp's face as Support 1.
-
Select Wall.3 in the specification tree as Support 2.
-
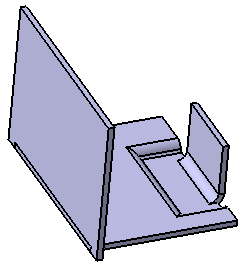
Click OK in the Bend Definition dialog box to create the bend on the surface stamp.

To deselect a wall, simply click on another wall available in the part. 
- The stamp must be open, contain a planar face, and have a radius higher than 0.
- You can intersect a closed bend with a flange.

![]()