Using a Surface
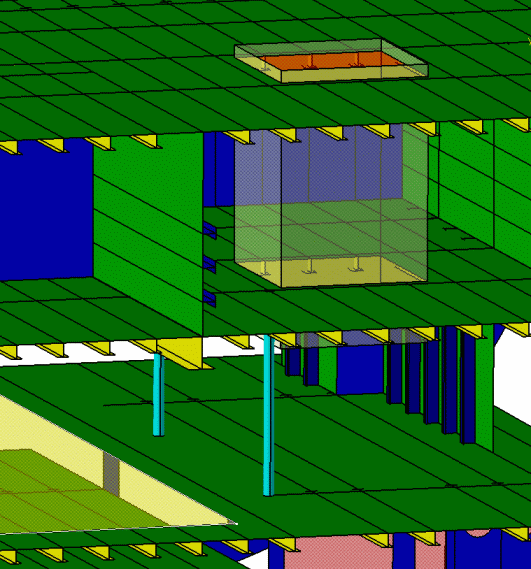
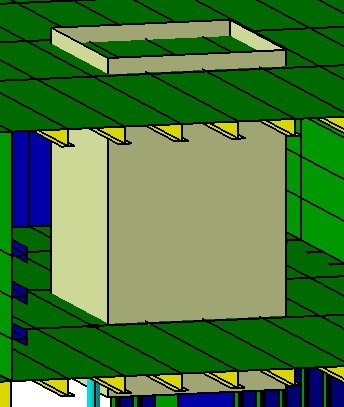
To create openings using a surface, the cutting object must physically intersect the object in which you are creating an opening, as shown below. After you have taken the steps shown above:
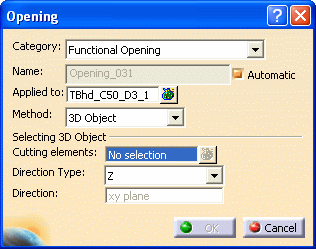
- Select the 3D object you want to use. The object displays in the Cutting Elements field, and a preview of the opening is placed on the object you selected.
- You do not need to make any selection in the Direction Type field if you are selecting a surface to define your 3D cutting object.
- If you are using the same 3D object to make openings through more than one deck, as in this example, you need to repeat the process with the other decks.
NOTE: As your cutting element, you can use an existing 3D object, or create one using an application like Generative Shape Design.
Wireframe
There is a significant difference in behavior if you use a wireframe 3D object as your cutting element. As an example, when placing an opening in a plate, the wireframe object and the plate do not intersect, therefore the opening is created by projecting your selected wireframe contour on to the plate.
By default, the projection is perpendicular to the plate on which the opening is to be placed. You have the option of changing the default projection, and making it perpendicular to the wireframe object you are using. You can also specify a direction by selecting a line or plane.
To create an opening using a wireframe object, follow Steps 1 to 5 and then:
- Select the wireframe object you want to use. The object displays in the Cutting Elements field, and a preview of the opening is placed on the object you selected.
- Select a direction (X, Y, Z) in the Direction Type field. If you do not want to select an X, Y, Z direction, then select Unspecified, in which case the direction will be along the plane of the wireframe object. If you want a different direction, then select a line or plane. The object, plane or line you select will display in the Direction field.