.
2.
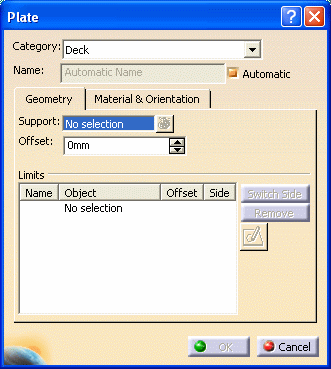
Under Offset, you can define the offset value of each plate limit. A positive value adds material. A negative value removes material. Additionally, limit tags display in your 3-D session to assist with plate limit management.
|
|
This task leads you through a simplified deck creation process. See the section Creating a Plate for detailed information on creating a deck, and other types of plates. | |
|
|
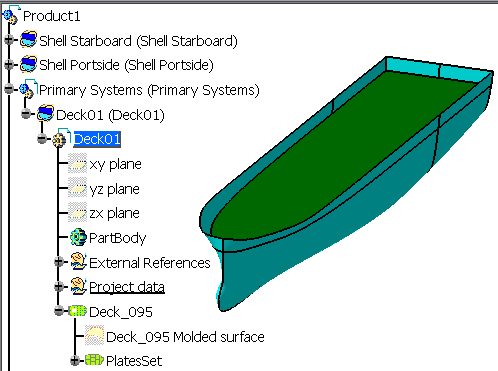
1. | Create an SFD
system under the Primary Systems product (see
Organizing Your Document), rename it if necessary. Select the CATPart
that is created under the system in the specifications tree and go
Start - Equipment & Systems
- Structure Discipline -
Structure Functional Object Design. The image below shows the
specifications tree structure and the completed deck.
|
|
. |
2. |
Click the
Plate button
|
| 3. | Select the category Deck and select the Automatic checkbox. | |
| 4. | Select a plane for the support. This is where the deck will place. | |
| 5. | Limit (or trim) the excess plate by clicking somewhere in the Limits
field, then select the object you want to use to indicate the limit. The
plate will be trimmed and the Limits field will display the
object you selected. Under Offset, you can define the offset value of each plate limit. A positive value adds material. A negative value removes material. Additionally, limit tags display in your 3-D session to assist with plate limit management. |
|
| 6. | Click OK when you have finished. | |
![]()