 |
-
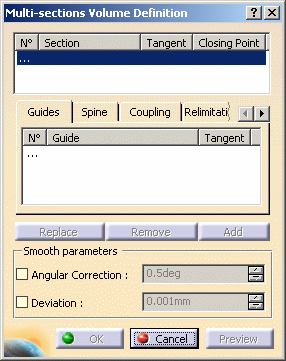
Click Multi-sections Volume
 . .
| The Multi-sections Volume Definition dialog box appears. |
 |
-
Select two or more planar section curves.
| The curves must be continuous in point. |
 |
A closing point can be selected for a closed
section curves |
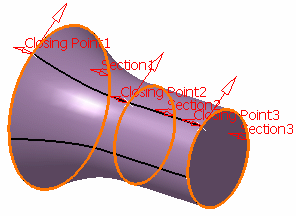
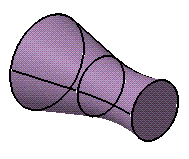
| Example of a multi-sections volume defined by
three planar sections: |
 |
-
If needed, select one or more guide curves.
 |
Guide curves must intersect each section curve
and must be continuous in point. |
| The first guide curve will be a boundary of the multi-sections
volume if it intersects the first extremity of each sections curve. |
| Similarly, the last guide curve will be a boundary of the
multi-sections volume if it intersects the last extremity of each
section curve. |
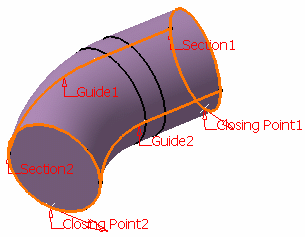
| Example of a multi-sections volume defined by 2 planar
sections and 2 guide curves: |
 |
Imposing Tangency conditions
|
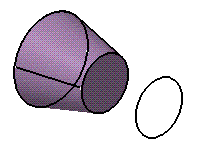
- You can make a multi-sections volume tangent to an adjacent
volume by selecting an end section that lies on the adjacent
volume. In this case, the guides must also be tangent to the
volume.
| In Figure 2 a multi-sections volume tangent
to the existing volume has been created: |
| Figure 1: |
Figure 2: |
 |
 |
|
- You can also impose tangency conditions by specifying a
direction for the tangent vector (selecting a plane to take its
normal, for example). This is useful for creating parts that are
symmetrical with respect to a plane. Tangency conditions can be
imposed on the two symmetrical halves.
- Similarly, you can impose a tangency onto each guide, by
selection of a surface or a plane (the direction is tangent
to the plane's normal). In this case, the sections must also be
tangent to the volume.
|
-
In the Spine tab page, select the Spine
check box to use a spine that is automatically computed by the program or
select a curve to impose that curve as the spine.
 |
The spine curve must be normal to each section
plane and must be continuous in tangency. |
Smoothing Parameters
|
In the Smooth parameters section, you can check:
- the Angular Correction option to smooth the lofting
motion along the reference guide curves. This may be necessary when
small discontinuities are detected with regards to the spine
tangency or the reference guide curves' normal. The smoothing is
done for any discontinuity which angular deviation is smaller than
0.5 degree, and therefore helps generating better quality for the
resulting multi-sections volume.
- the Deviation option to smooth the lofting motion by
deviating from the guide curve(s).
|
-
It is possible to edit the multi-sections volume
reference elements by first selecting a curve in the dialog box list, or
by selecting the text on the figure, then choosing a button to either:
|
|
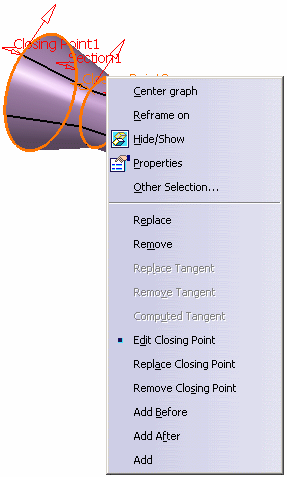 |
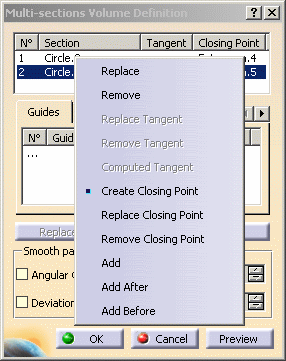
| More possibilities are available with the contextual menu and by
right-clicking on the red text or on the object. For example, it is
possible to remove and replace tangent volumes and closing points. |
 |
-
Click OK to create the multi-sections volume.
| The volume (identified as Multi-sections Volume.xxx)
is added to the specification tree. |
 |
For further information about the other tabs,
please refer to the
Creating
Multi-Sections Surfaces chapter. |
|
![]()