
|
Once you have performed a Deviation Analysis, you may want
to highlight some peculiar locations and to add comments.
This task will show you how to create Annotations and organize them under
Annotation Sets:
- A node Deviation
Check is created in the specification tree.
It is dedicated to
annotations and deviation reports.
A CATPart can contain only one Deviation Check
node.
- Under this Deviation Check node, you can create as many
annotation sets as required.
You will then create annotations under an
annotation Set:
- An annotation set contains annotations made on one given deviation
analysis,
- Annotations made on one given deviation analysis are not placed
necessarily under the same annotation set.
- All annotations in a given annotation set have the same format,
which can be edited through the annotation set.
- Annotations are associative with the deviation analysis. Modifying
the deviation analysis will update the annotations accordingly.
- If an annotation is not up-to-date, the whole annotation (text and
frame) is displayed in red.
- Annotations, annotations sets and Annotation Check can be
deleted using the standard Delete command.
|

|
-
Click Annotation Set
 in the Deviation Check toolbar.
If it does not yet exist, a Deviation Check node is created in
the specification tree.
An annotation set Annotation Set.1 is created under
Deviation Check.

If you repeat this step, an annotation set Annotation Set.2
will be created directly under Deviation Check.
-
Click Annotation
 in the Deviation Check toolbar.
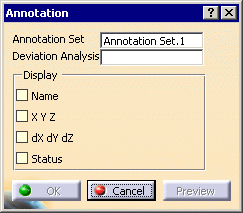
The Annotation dialog box is displayed.
-
If you have not created any annotation set yet:
- a Deviation Check node is created,
- an annotation set is created under Deviation Check,
- the name of this annotation set is displayed in the dialog box.
-
If you have already created one annotation set, its name is
displayed in the dialog box.
-
If you have already created several annotation sets, select the one
under which you want to create the annotation.
Its name is displayed
in the dialog box.
|
-
Select the Deviation Analysis on which you want
to create annotations:
- If you had not selected a Deviation Analysis before
clicking Annotation, select one.
Its name is displayed in
the dialog box.
- If you had selected a Deviation Analysis before
clicking Annotation, it is highlighted in the 3D viewer
and you can move your cursor on it.
Do not select another
Deviation Analysis: it will not replace the current selection
and you will not be able to create annotations on it.
- Once you have selected a Deviation Analysis, you
cannot change your selection without exiting the dialog box by
Cancel.
|
-
Place your cursor on the Deviation Analysis.
The annotation is displayed in a black frame.
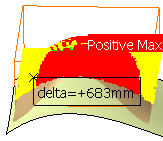
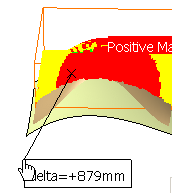
Click where you want to anchor the annotation, then drag and drop the text
to where you want to display it.
-
You can define the display format of the annotation,
before creating or later, with the
Display check boxes:
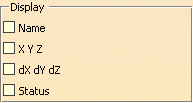
The same display format is applied to all the annotations of the same
annotation set. Select the required check boxes:
- Name: displays the name of the annotation as it
appears in the specification tree:
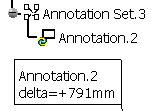
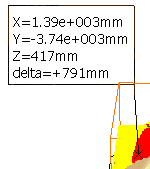
X Y Z: displays the coordinates of the anchor point
of the annotation, i.e. the point you wanted to highlight:
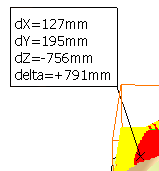
- dX dY dZ: displays the deviations at the anchor
point, in the X, Y and Z direction:
- Status: the
Tolerances must be displayed in the Deviation Analysis.
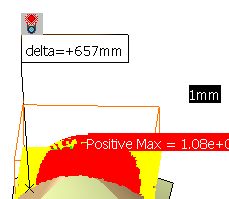
Status displays the status of the anchor point of the
annotation with respect to the tolerances:
- if the status is KO, a red light appears at the top left
corner of the annotation and the text of the annotation is
displayed in red,
- if the status is OK, a green light appears at the top left
corner of the annotation and the text of the annotation is
displayed in green,
- if the deviation value at the anchor point is positive,
the status is OK if the deviation value is less or equal to
the positive tolerance. Otherwise the status is KO.
- if the deviation value at the anchor point is negative,
the status is OK if the deviation absolute value is less or
equal to the positive tolerance. Otherwise the status is KO.
- If the Status check box is not selected or if
the Tolerances of the Deviation Analysis
are not displayed, the annotation is displayed with no light.
|
|
You can select several check boxes.
-
Click OK to validate and exit the dialog box.
|
