|
|
This
command called "Define Contextual Links" uses the existing panel of the
"Change Context" command. Therefore, the command can be used in the Change
Context command. New buttons have been created in the Change Context
window: Edit and Replace.
The Define Contextual Link command enables to define (change) all the contextual links before and during the Change Context command. You can also make the operation on contextual parts, to modify unsolved links. You have the possibility to: |
||||||||||
|
|
Contextual Links:For contextual parts, the reference keeps a link with the Original or Definition Instance (or Original Part). For each part, every instance keeps a link with its reference. But the Contextual Reference (or Contextual Part) has only one link, with a single instance that is contextual. This unique link allows you to know the name of the document (CATProduct) on which the part 's external geometry rests. There is a distinction between the Original Instance and the subsequent Contextual References because the geometrical definition of contextual Parts depends on neighboring components (support) in the Assembly. The Geometry of the Contextual Part depends on another instance in the same Assembly (second link). Three Instances of Contextual Part exist: |
||||||||||
|
|
This icon shows that the Part Reference is contextual and this Instance is the Definition Instance. The green gear and the blue chain signify the "original" instance of a part that is contextual (driven by another part, built with another part's data) in a CATProduct. | ||||||||||
|
|
This contextual part, represented by the white gear and the green arrow, is an Instance of the Definition Instance, coming from the Contextual Part. The geometry of this instance is connected with the Definition Instance (contextual link). Note that you can edit this contextual part. | ||||||||||
|
|
The
brown gear and the red flash signify that the Part reference is contextual
and that this instance is not used in the Part Definition. Note that you
can edit this Contextual Part. This symbol can appear when you copy /
paste or insert a Contextual Part into another CATProduct without taking
into account the contextual links. In this case the user needs to resort to the "Define Contextual Links" or "Isolate Part" commands in order to redefine the context of the Part and this red flash will be turned into a blue chain or green arrow. |
||||||||||
|
|
For more information, please read the following scenarios: Defining Contextual Links: Editing and Replacing Commands, and Isolating a Part in Product Structure User' Guide. | ||||||||||
|
|
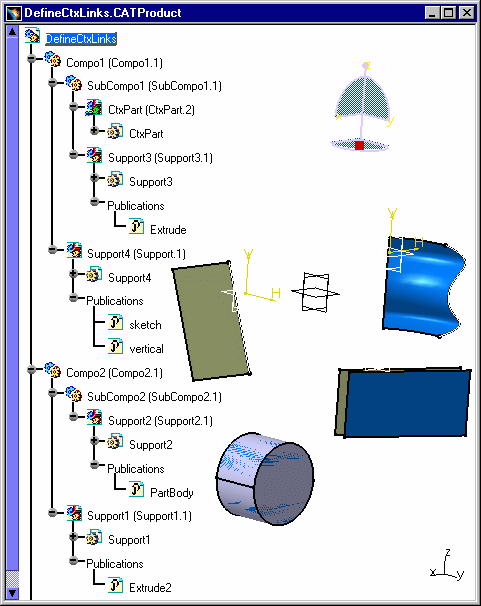
Open
the DefineCtxLinks.CATProduct
document.
|
||||||||||
|
|
How to Replace a Part or a Publication
|
||||||||||
|
|
Only
the selection of a Publication (not other element) is possible in the
Specification Tree (not in 3D).
|
||||||||||
And you
can immediately visualize the expected status: Connected.
|
|||||||||||
|
|||||||||||
|
|
|||||||||||
|
|
How to Edit a Part or a Publication |
||||||||||
|
|||||||||||
|
|
Open the DefineCtxLinks.CATProduct document. |
||||||||||
|
|||||||||||
|
|
|||||||||||
|
|||||||||||
|
|
Open the DefineCtxLinks.CATProduct document. |
||||||||||
|
|||||||||||
|
|
|||||||||||
|
|||||||||||
|
|
Open the DefineCtxLinks.CATProduct document. |
||||||||||
|
|||||||||||
|
|
The Edit functionality is the same with Publications. | ||||||||||
|
|
Always the top most Publication in the scope of the common reference product is used to define the Contextual Link. The top most Publication represents the better logical access to a given geometry while the internal path to this geometry is not exposed for the user point of view. When it exists, the Publication at the Assembly level is then selected. | ||||||||||
|
|
|||||||||||


