Depth of field can be used with perspective
cameras/viewpoints only. Depth of field and glow effects work
independently from each other.
-
Click Create Shooting
 to open the Shooting Definition dialog box then select the
Effects tab:
 -
Click Active to activate the depth of field.
As soon as the option is selected, the Confusion radius box is activated and the preview displayed to the right is updated: 
As you already know it, ray tracing is a rendering technique that computes the color for a given pixel by sending 1 ray from the camera into the scene.
In case of depth of field effect, 4 rays are sent for each given pixel and the 4 resulting colors are then used to compute an average value, thus creating a blurring effect.
Let's have a look at the schema below illustrating depth of field: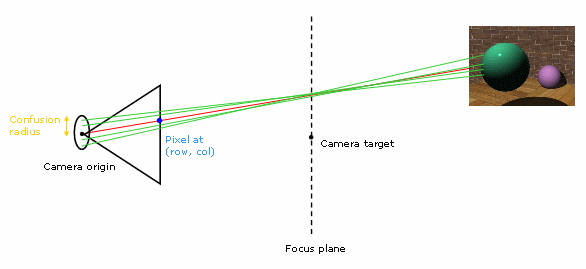
The focus plane is a fictive plane perpendicular to the camera axis (the view direction) whose origin is located at the camera target. The focus plane represents the "sharpness plane", i.e. the distance at which objects appear clear in outline.
The red line corresponds to a ray sent without any effect whereas the green lines correspond to rays sent for a depth of field effect.
The blue dot is the pixel in the rendered image (identified by its row and column coordinates) whose color will be determined by the ray (rays in case of depth of field) cast from the camera. -
Use the Confusion radius box to specify the radius of the camera origin from which rays are sent.
You can enter values comprised between 1 and 10 millimeters and check the result in the preview displayed to the right. The smallest the radius, the sharpest the result. If the result is not satisfactory despite a small radius, you can access the Quality tab in the Shooting Definition dialog box and increase the accuracy. However, bear in mind that the more rays, the longer the processing time. -
Click OK to validate.
You are now ready to render the shooting by clicking Render Shooting
(you can also right-click the Shooting item in the specification tree then select Render Single Frame).
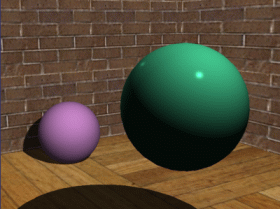
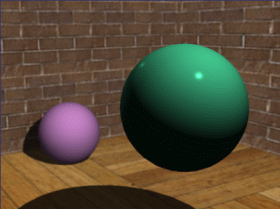
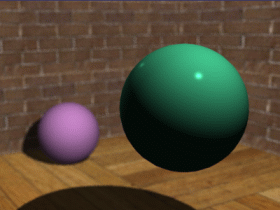
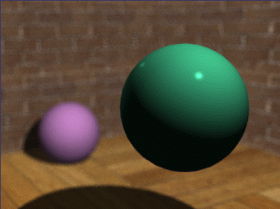
The following are samples illustrating the various results you can obtain:
No depth of field Confusion radius = 1.5 mm
Confusion radius = 3 mm Confusion radius = 5 mm
