|
|
This page illustrates two different cases of ribs obtained from open profiles, then the use of the Merge rib's ends and Merge Ends options available in the Rib Definition dialog box. | |
|
||
|
|
|
|
|
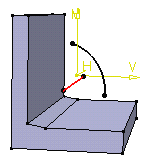
Initial Profile (in black) and Center Curve (in red) |
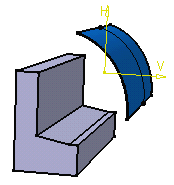
Resulting Rib The rib is obtained just by extending its open profile onto existing material. |
|
|
||
|
If the rib cannot be trimmed by existing material, the only way of obtaining a rib is by using the Thick Profile option: To create this, thickness has been added to each side of the profile |
|
|
|
|
Resulting Rib |
|
The Merge rib' ends option trims each extremity of the rib to existing material, starting from the profile position until the first limit encountered on existing material in each direction. In the following example, the blue rib is created using Merge rib's ends. The profile (a red circle) swept along the green center curve is trimmed on each direction to the first faces encountered. |
||
|
|
|
|
| Without using the Merge rib's ends option | Using the Merge rib's ends option | |
|
||
| The Merge Ends option is to be used for
thin ribs (or slots). It trims a
set of profiles to themselves while trimming them to existing material
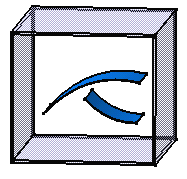
too. If you consider this initial sketch composed of two curves : |
|
|
| Without using the Merge Ends option, you obtain this result: |
|
|
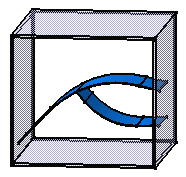
| Using the Merge Ends option, you obtain this result: |
|
|


