Place Connector on Hole in V4 Document
|
|
This task shows you how to place a connector on a hole in a V4 document that has been imported into V5. | |
|
|
1. | Click on Start - Mechanical Design - Part Design. You need to have a license to use the Part Design product. If you do not have a license then use the compass method, outlined below, to place the connector. |
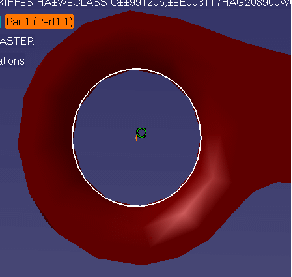
| 2. | Select the part geometry near the
hole on which you want to place a connector.
|
|
| 3. | Click the
Sketcher button
|
|
| 4. | Zoom into the hole and, using the
three-point circle tool
|
|
| 5. | Create a point at the center of the
hole, using the point tool
This is all the geometry you need in order to place a connector over the hole. You can now follow the steps outlined in Creating Connectors. |
|
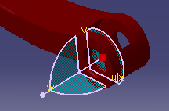
| 6. |
Using the compass Position the compass on the center line of the hole (holes in V4 models have a center line).
|
|
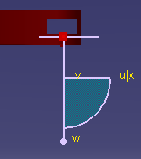
| 7. | Change to a view that gives the
clearest view, in this case the top view.
|
|
| 8. | Adjust the compass so that you have the correct plane and alignment. The compass provides the geometry needed by a connector to snap to. | |
| 9. | Follow the steps given in Creating Connectors. | |
|
|
||