-
Click New Section From 2D Planes
 in the Layout toolbar (Views sub-toolbar).
 -
Select a plane from the specification tree or from the geometry area (the xy plane, for example).
-
Select another plane from the specification tree or from the geometry area (the yz plane, for example).

- You cannot select two parallel planes.
- You could also select a 3D plane created using the 3D
Plane command
 .
For more information, refer to Creating a
3D Plane.

- Do not select a plane in the 3D window, as this will stop the command. You must select both planes in the 2D window.
The Tools Palette is automatically displayed with the following options:
-
 Section View: creates a section view.
 -
 Section Cut: creates a section cut.

These options are also available from a contextual menu. -
Select the Section Cut icon
 .
.
Click on the sheet at the location where you want the view to be positioned.

- Section views/cuts are always created using the sheet scale. The primary view scale, when it is different from the sheet scale, is not propagated to other section views/cuts.
- If you change the sheet scale (defined in the sheet properties), the scale of all existing views (defined in the view properties) is multiplied by that of the sheet (for example, if existing views already have a scale of 1/10, and if you change the sheet scale to 1/10, then existing views will now have a scale of 1/100).

Note how the view is previewed in the part window. You need to zoom out, as the view box defined in the ISO_3D standard used by the current layout has sides of 1000mm. For more information on the standards, see Administration Tasks.
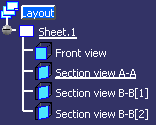
Two empty aligned section views are created. Additionally, two new Section view items are added to the specification tree.
You can now create 2D geometry in these views.
More about creating a section from two planes
The two section views or cuts have a number of common characteristics. However, the first-created view has a few characteristics of its own. To enable you to distinguish between the views, their name is suffixed ([1], [2]) to indicate their rank: the suffix [1] indicates the first-created view.
The first-created view has the following characteristics:
- Its origin and normal are identical to those of its related 3D plane.
- Its H axis is on its related 3D plane and oriented towards the intersection of both planes.
The secondly-created view has the following characteristics:
- This view has no frame.
The two views share the following characteristics:
- Their V axes are along the intersection of both planes.
- They share the same origin in the layout sheet, their local axes (H and V) overlap.
- They have folding lines which correspond to the intersection of both planes.
- Their axes and origins are not associative to the 3D planes.
- They cannot be linked in position with another view.
![]()