![]()
This task shows you how to run a kinematics simulation with commands.
![]()
Insert the KIN_EX17* .model files from the samples folder.
![]()
If you work with the Cache System, make sure you are in Design mode (select Edit > Representations > Design Mode). for more detailed information, refer to the DMU Navigator user's Guide - Task: Viewing the Cache Content.
![]()
In our sample document, there is only one mechanism. If you work with a product containing more than one mechanism, it is strongly recommended to select the mechanism you need before starting the simulation with commands.
-
Click Simulation with Commands
 .
.
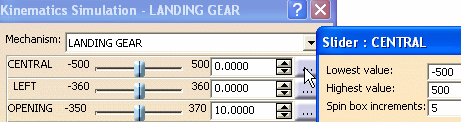
The Kinematics Simulation dialog box is displayed:
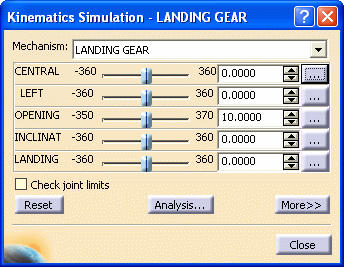
The commands of the kinematics mechanism are available as shown -
Manipulate the slider of a command. For instance select the LEFT.
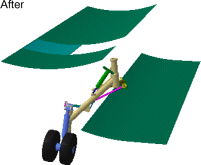
The corresponding part of the kinematics mechanism moves accordingly 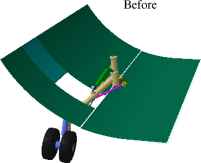

Note that if you click
 ,
the Kinematics Simulation dialog box expands. The
immediate option is set by default. For more information about
the On request option, refer to
Simulating on Request.
,
the Kinematics Simulation dialog box expands. The
immediate option is set by default. For more information about
the On request option, refer to
Simulating on Request.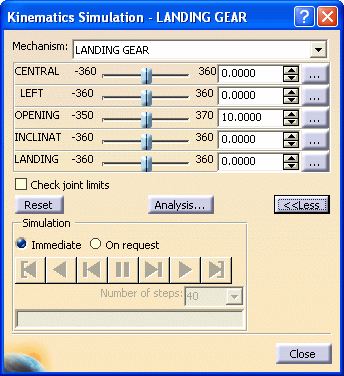
You can use the slider, enter a value or manipulate the geometry directly to achieve the same result.
-
Manipulate the other commands in the same way.
-
(Optional) Modify the value of a specific command if you want (For instance, modify the CENTRAL command values to -500 and 500 (joint limits):

In V4 mechanisms, note the joint limits are stored in KinematicsUI.CATSettings file in the CATSettings and not in the V4 mechanism. Consequently, if you remove your CATSettings, the limits set are removed too.
![]()