![]()
This task shows how to create Roll Curve joints in a V5
mechanism.
![]()
Open the
RollCurve_without_kin.CATProduct document.
![]()
When you create joints, you can define the mechanism within the same dialog box. Remember though, that you create a mechanism independently from the joints by selecting Insert > New Mechanism... from the menu bar.
-
Click the arrow within the Revolute Joint icon.
-
Undock the Kinematics Joints toolbar:

-
Select Roll Curve Joint
 .
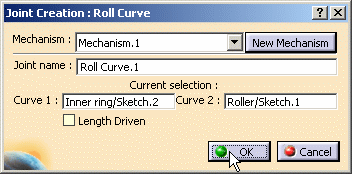
The Joint Creation: Roll Curve dialog box is displayed.
.
The Joint Creation: Roll Curve dialog box is displayed.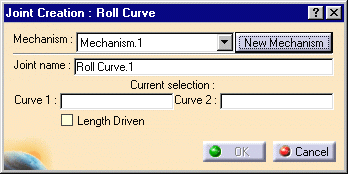
-
Click New mechanism. The Mechanism Creation dialog box is displayed:
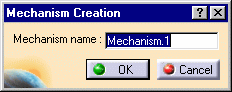
In our example, keep the default name Mechanism.1.
-
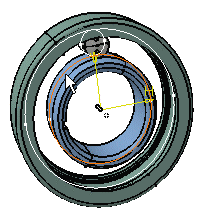
Select Curve 1, in our example, select the inner ring in the geometry area. The current selection field is automatically updated with your selection.
-
Select Curve 2, for instance select the roller as shown below:
-
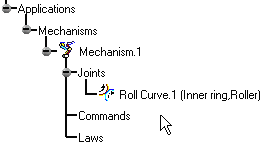
Click Ok to end the roll curve joint creation.
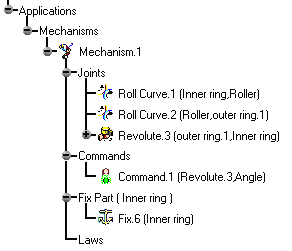
The specification tree is updated.
-
Now, create Roll Curve.2. For this click Roll Curve Joint
again.
The Joint Creation: Roll Curve dialog box is displayed. -
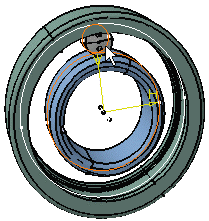
Select the outer ring as curve 1 and the roller as curve 2 in the geometry area
-
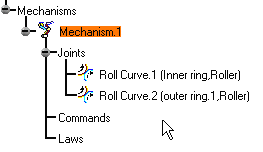
Click Ok to end the Roll Curve. 2 joint creation.

The specification tree is updated
-
Now, create Revolute. 3. For this, click the Revolute Joint icon
 .
.
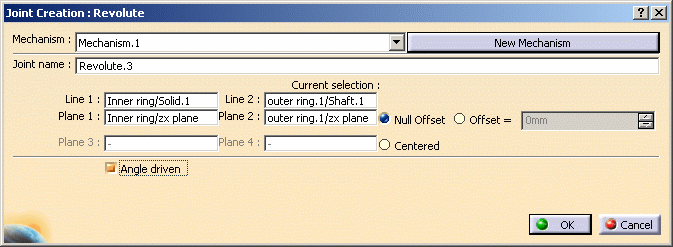
The Joint Creation: Revolute dialog box is displayed. -
Select the lines and the planes:
-
Inner ring axis for line 1
-
outer ring axis for line 2
-
zx plane (inner ring)
-
zx plane (outer ring)

Remember you can use the preselection navigator, it can be helpful to select the planes.
Refer to Selecting Using the Preselection Navigator in the Infrastructure User's Guide
-
-
Assign the command, for this select the Angle driven check box
In Edition mode only:
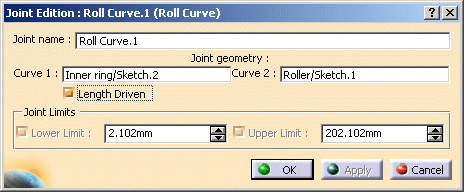
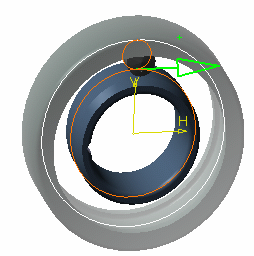
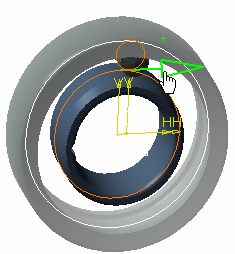
you can verify the command orientation defined by a green arrow in the geometry area and in this example (command assigned to a revolute), you can change its orientation:
-
The parts which are not involved in the joint creation are displayed in low light (to easily locate the joint you are working on):
Picture.1 -
Pass the cursor over the green arrow to launch a short animation
-
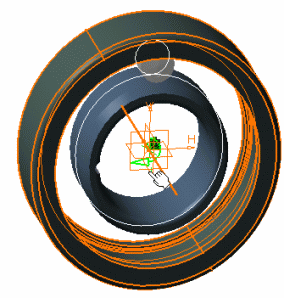
Click the arrow to change the command orientation if necessary:
Picture.2
Picture.1Picture.2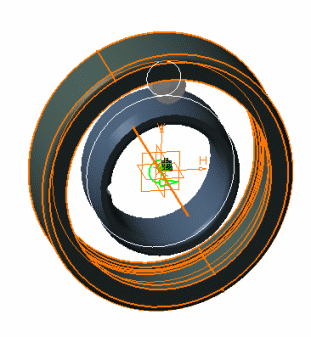
-
-
Click Ok to end the revolute joint creation.
The specification tree is updated. -
Click Fixed Part
 or select Insert > Fixed Part... from the menu bar. The
New Fixed Part dialog box is displayed.
or select Insert > Fixed Part... from the menu bar. The
New Fixed Part dialog box is displayed.
-
Select the inner ring as fixed part either in the geometry area or in the specification tree.
The specification tree is updated and the mechanism can be simulated.
Open the RollCurve_with_kin.CATProduct document to check your result.
![]()
It is impossible to create roll curve joints if the parts
involving the joint are not well positioned.
For more detailed information, refer to
Tips for Curve or Surface Joints Creation
![]()
For more information, refer to About Joints and Creating Mechanisms and Joints.
![]()