Converting Constraints into Joints 
(Beginner's Mode)

This task shows you how to convert Assembly constraints into V5 joints.

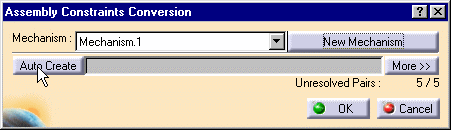
The Assembly Constraints Conversion capability enables only basic joints to be created from constraints (revolute, cylindrical, rigid, planar, sperical and prismatic).
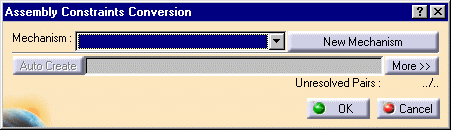
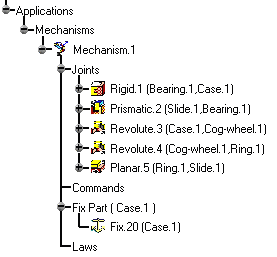
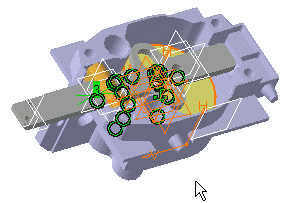
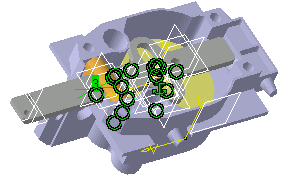
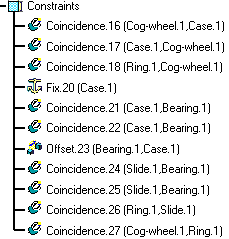
Open the jigsaw_with_constraints.CATProduct document. The constraints are visible both in the geometry area and in the specification tree.
If you work with the cache system, make sure you are in design mode (select Edit > Representations > Design Mode.). for more detailed information, refer to the DMU Navigator user's Guide - Task: Viewing the Cache Content
  1. Make sure you are in Design Mode (Edit > Representations > Design Mode).

  2. Click the Assembly Constraints Conversion icon from the DMU Kinematics toolbar. The Assembly Constraints Conversion dialog box appears:

  3. Click on the New mechanism button. When done click OK.

  4. Click on the Auto Create button to launch the operation.
    You can see that there are 5 unresolved pairs of products

    The constraints are converted into V5 joints. The 5 joints are identified in the specification tree and highlighted in the geometry area
    You need to create the command manually or click the button and refer to Converting Constraints into Joints (Advanced Mode)
  5. Click Ok to confirm your operation. Now, let's create the command

  6. Double-click Revolute. 4  in the specification tree. The Edit Joint Edition dialog box is displayed

  7. Select the Angle driven checkbox and then click OK to create the command.
    The command is created and identified in the specification tree:

    ainfo.gif (980 bytes) An information message is displayed, your mechanism can now be simulated
     
  8. Click OK.