|
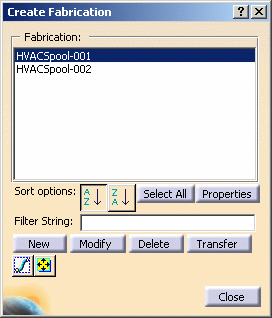
When modifying a fabrication, your options are limited to extending its
range to include additional members or removing members. Remember
that members may only be removed from the ends of a fabrication. |
|
3. |
Click to activate the Show all
fabrications option. This will highlight all fabrications in
the product.
In the image below, the upper spool is Spool-001, while the lower spool is
Spool-002. 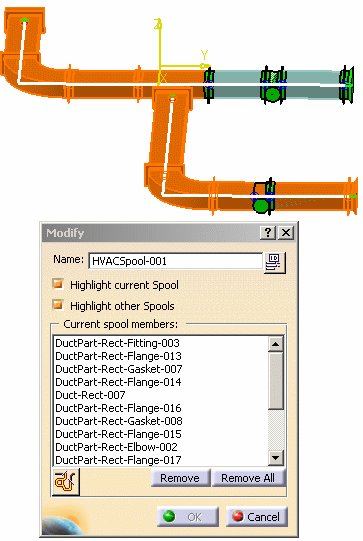
|
|
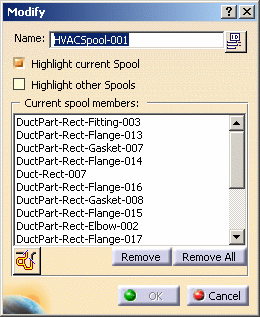
4. |
To
remove a member select it in the Modify dialog box and click the Remove
button. In the view below, members have been removed from Spool-001.
|
|
5. |
To add members to a spool:
- You can redefine the range of
the spool by clicking the Define range
button
 . The
Analyze Network dialog box displays. Under the
Path tab the range is
undefined. Proceed in defining the range as described in
Creating
a Fabrication. Select the beginning and end of the spool to
include the new members. . The
Analyze Network dialog box displays. Under the
Path tab the range is
undefined. Proceed in defining the range as described in
Creating
a Fabrication. Select the beginning and end of the spool to
include the new members.
- Click on the part you want to add, in the 3D viewer. The part will
be added to the spool. If a part cannot correctly be added to a spool you will not be able
to select it.
|
|
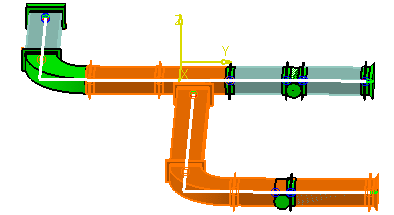
6. |
In the image below a new range of
members are added to Spool-001.

|
|
7. |
Click OK
and then Close the Create Fabrication dialog box. |