
To create a spool in a new document check the option Create spool in a new document and enter a file name in the window that displays. The new document needs to be created beneath the run's parent product.


![]()
|
|
This task shows you how to create a fabrication. | |
|
|
A fabrication is a grouping of HVAC components much like an assembly is a group of components or parts. | |
|
|
1. | In the following scenario a series of runs
have been connected. Click on the Create Fabrication button
|
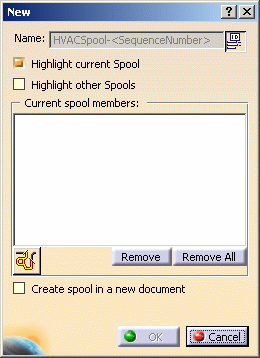
| 2. | Click on the New button. The New
dialog box displays. The option Highlight current spool is
preselected. This highlights the parts as you select them to add to a new
spool. If you want to see existing spools in the document, select
Highlight other spools.
To create a spool in a new document check the option Create spool in a new document and enter a file name in the window that displays. The new document needs to be created beneath the run's parent product. |
|
| 3. | You need to define the range (from-to) for the spool you
want to create. Click the Define elements in range
button
|
|
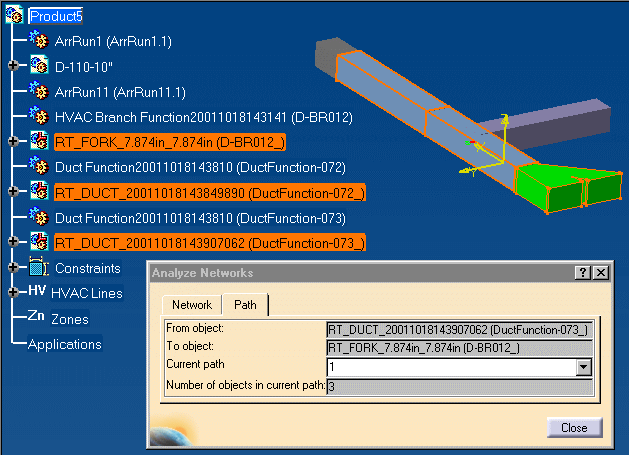
| 4. | Click on the Path tab and
select the From and To objects of the fabrication you want to create. The
image below shows the selected fabrication.
|
|
| 5. | The fabrication is highlighted in the 3D viewer as are its members in the specification tree. The Analyze Networks dialog box displays the From object and To object as well as the Number of objects in the current path. | |
| 6. | Click the Close button on the Analyze Networks dialog box. | |
| 7. | The New dialog box opens again allowing
you to name the fabrication you just created. You may accept the
default name or assign a name of your choosing. Click on the Use
ID Schema button
|
|
|
|
Click again on the Create Fabrication button to see the list of fabrications you have created. | |
|
|
||