NOTE: When placing section parts in the catalog, you should place the horizontal section part first, then the vertical section part, and after that any other section parts you want to add.
![]()
|
|
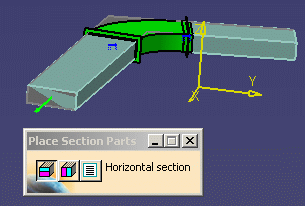
This task shows how to define and place a section at the end of a HVAC part. | |
|
|
When you define and place an HVAC section you are dividing (splitting) the duct end section so as to add smaller runs and ducts that run in different directions, like branching. There is no length (or depth) parameter to a section although it appears so when placed in your document. | |
|
|
1. | With your HVAC document open, click the Place Section
button
NOTE: When placing section parts in the catalog, you should place the horizontal section part first, then the vertical section part, and after that any other section parts you want to add. |
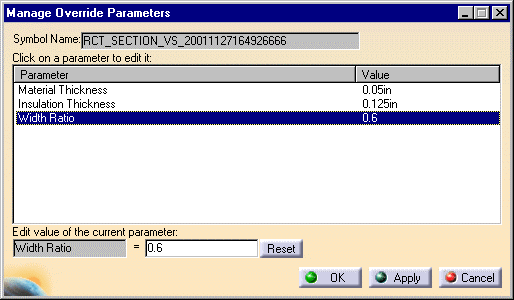
| 2. | With the new section displayed and the green arrow still
visible, the Manage Override Parameters dialog box will open. You can
make changes to the parameters shown. The width ratio shown (0.6),
reflects a 60/40 split of the duct section. The width ratio (vertical
section) or height ratio (horizontal section) can be changed to obtain the
desired section.
|
|
| 3. | Make your changes and click OK. The
section is placed. To further divide the duct, place another section, this
time a horizontal section, over the previous one.
|
|
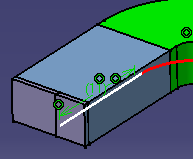
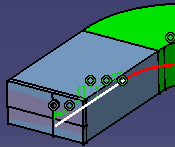
| 4. | Click OK when finished. | |
|
|
When placed, the section has connectors for each portion from which you can continue routing. In the view above (right) there are four connectors available. | |
|
|
||