Adding an User-defined Population

Follow these steps to add a new population into the Human Measurements Editor:
 

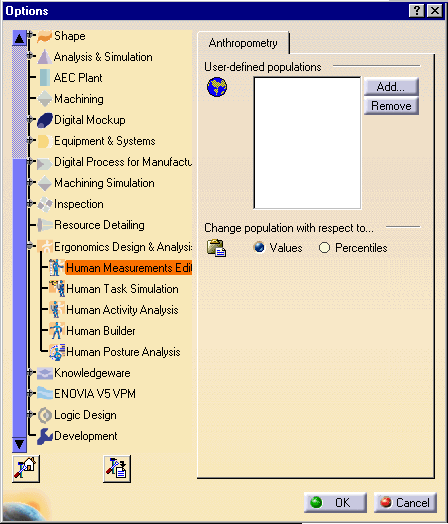
Choose Tools > Options from the main menu. Go to the Ergonomics Design & Analysis section, then select Human Measurements Editor.


  1. In the Anthropometry tab, there are two sections, User-Defined populations and Change population with respect to...

  2. In the User-defined populations section of the Anthropometry tab, click the Add button.

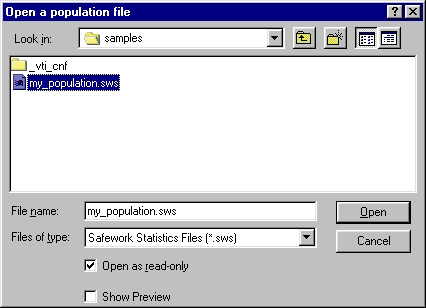
  3. The Open a population file dialog box appears allowing you to select a population file.


    A population file is a SAFEWORK statistic file describing a population. It contains the user-defined dimensions for the population under study, and follows a very precise format. The file, my_population.sws, is an example of such a population file. See the Advanced Task, Creating a Population File, for more details.
     

  4. Select the desired population file, and Open. If the file specified is read successfully, the corresponding population is added to the list; otherwise an error message is displayed.
     

  5. To add another population to the list, repeat steps 1-3 above.
     

  6. Select OK to close the Open a population file dialog box.
     

  7. From now on, it is possible to create a manikin that uses the new population that was just added.
     

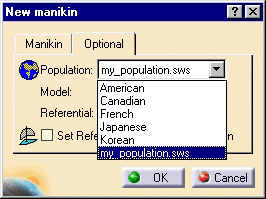
  8. In the Human Builder Workbench, select Create a Manikin and choose "my_population.sws" from the Population pull-down menu in the New Manikin dialog box.

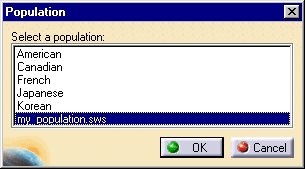
Added user-defined populations will also be available in the Human Measurements Editor workbench by activating Population in the Anthropometry Editor toolbar.
  Change population with respect to....

This function implies that the system would respect the value or percentile subsequent to a copy/Paste function.  Actually, however the choice of units (value or percentile) by the user applies after changing the population.