 |
This task shows you how to place
a hanger on a loft. |
 |
To place
a hanger on a loft section, select the section.
When you place a hanger on a loft it splits the loft. For instance, if
you place two hangers on a loft, that loft will split into three lofts. |

|
1. |
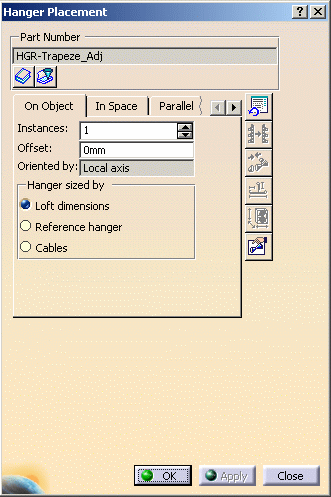
With your document open, click the
Place Hanger button
 and then select the
On Object tab in the Hanger Placement dialog box that
displays. If the Part Number field displays a hanger, make sure
it is the hanger you want to use. If it is not, then click the Reset
Tab Page button and then select the
On Object tab in the Hanger Placement dialog box that
displays. If the Part Number field displays a hanger, make sure
it is the hanger you want to use. If it is not, then click the Reset
Tab Page button  to clear the field.

|
|
2. |
Define the orientation of the
hangers you will place. (See Orienting a Hanger.)
You can choose to use one of two methods to orient the hanger you intend
to place. If you do not use any method, then the hanger orientation will
be based on the local axis. This means that the downcomers will point in
the Z direction of the axis. |
|
3. |
Select one of the options under
Hanger Sized By.
- Loft Dimensions: the hanger will resize to the size of
the loft.
- Reference Hanger: the loft will resize to the size of the
hanger.
- Cables: the hanger tiers will resize to be able to hold
all the cables in the loft.
|
|
4. |
Click on the loft where you want
to place a hanger. If the Part Number field displays
a hanger, that hanger is placed.
If the field is clear, the Catalog Browser
displays.
Expand the entry and select a part number. The Catalog
Browser closes, your selection displays in the Part Number
field of the Hanger Placement dialog box, and the hanger is
placed (it may take a few seconds).
Place more hangers by clicking again, or end the process by clicking
OK. |
|
5. |
You can also place more hangers by
selecting a hanger and entering the number of instances and the offset in
the Hanger Placement dialog box. You can change the direction
in which the hangers will be placed by adding a negative (-) sign before
the Offset value. |
