- The topological quality of the initial body is very important to obtain a good result
- The Local Healing creates new surfaces by deforming the input surfaces
in such a way
that the distance between the edges, and eventually the angle between the edges, reach a given value. - The 2D representation of the edges may be modified by the Local Healing: no constraints are set.
- Only the faces contiguous to the specified edge are taken into
account,
and only the constraints on these faces will affect the output. - This is an associative action. The output is a feature that is updated when the input is modified.
- More Reference Information is available in the Local Healing Parameters chapter.
We will first check the surface to find holes and tangency problems, then heal them.
-
Click Surface Connection Checker
 in the Check Geometry toolbar and select the surface.
 -
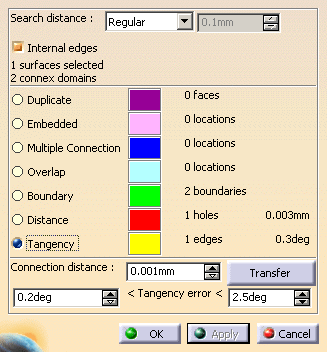
Set the Search distance at Regular (0.1 mm),
-
Select the Internal edges check option.
-
Select the Tangency line to activate the Tangency error field and enter 0.2 deg in the Tangency error box.
Click Apply.
-
From the dialog box, you can see that you have selected 1 surface, made of 2 connex domains,
presenting 1 hole of 0.003 mm and 1 tangency default of 0.3 degrees.
Select the Distance line. You can see the edge with a gap in red:
-
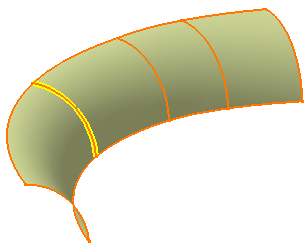
Now select the Tangency line. You can see the edge with a Tangency default in yellow:

-
Click Cancel to exit the action.
-
Click Local healing
 in the Repair Geometry toolbar and select the surface.
 -
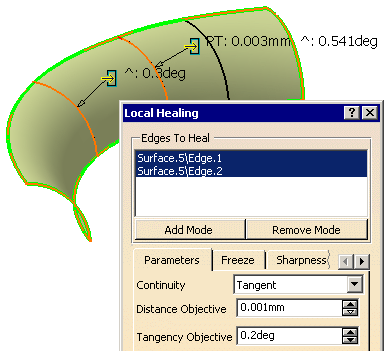
Click No selection in the Edges To Heal box and select the two defective edges.
-
Set Continuity to Tangent. Enter a Distance Objective lower than the gap found (e.g. 0.002mm)
and a Tangency Objective lower than the tangency default found (e.g. 0.2 deg). -
Go to the Visualization tab and select All in the Shown Solution(s) field. Click Apply.

The computed healed surface appears in green. You can see the shape has changed slightly.
The
 message
means that the initial tangency gap has been corrected.
message
means that the initial tangency gap has been corrected.The
 means that
the initial distance gap has been corrected,
as well as a temporary tangency gap.
-
The symbol
 at the beginning of the message means that the healing is impossible.
Check the healing options for incoherent constraints. -
A message like this at Apply indicates that the surface has been healed only partially:

-
You may have to re-initialize the display of the solutions by checking All or Not corrected again
- You can select additional edges to heal, or select edges to freeze or
to keep sharp
before you start the computation by pushing the Apply button. - Once the computation is started, a healed surface is computed and
displayed on the screen and in the specification tree.
If you select an edge, you will have an error message like this,
because you are selecting an edge on the computed, not on the initial surface.
Click Undo until the computed surface is removed from the specification tree and
select the required edge again, this time on the initial surface.
-
Click OK.
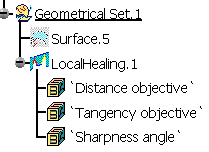
The initial surface is sent to the No Show and the healed surface appears on the screen and in the specification tree.
![]()