-
Choose the Tools > Options menu item,
Shape > FreeStyle tab, set the
attenuation value to 0.01 and click OK.
-
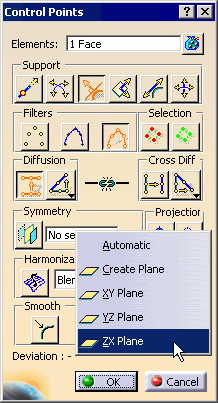
Select the roof surface and click the Control
Points icon:

| The Control Points dialog box appears: |
 |
-
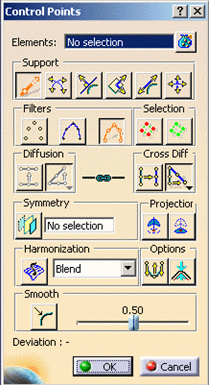
Click the Local Normals icon:

-
Click the Constant Law icon:

-
Right-click the Symmetry Plane selection field
and select the ZX Plane from the contextual menu.
-
Double-click the Symmetry
icon
 to lock the functionality.
-
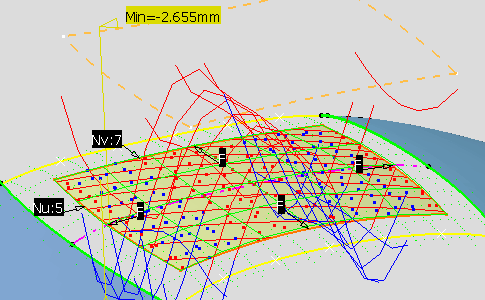
From the Dashboard, click the U, V Orders
icon:

-
Set the order numbers to Nu=5 and Nv=7 using the
contextual menu, to increase the number of mesh lines in U and V
respectively.
| This brings more flexibility in terms of modifications. |
 |
-
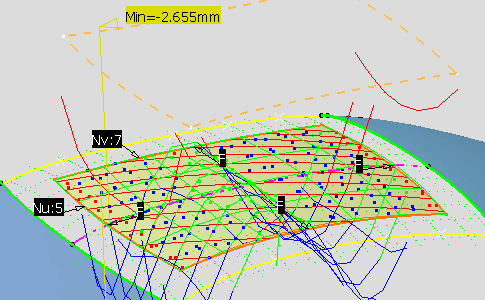
Decrease the deformation step to 0.75mm in the Dashboard toolbar.
-
Right-click the mesh and select the Freeze
command from the contextual menu, to avoid selecting points from the
cloud.
-
Select the central U mesh line and move it till you
display green points instead of red points.
| You may also need to decrease the step and attenuation values and the
number in U and V to reach a smoothed surface, i.e. displaying mostly
green points, that is lying between -0.15mm and 0.15 mm from the cloud of
points. |
 |