Creating Mesh Parts by Translation

This task shows how to create a translation mesh part from a parent mesh part.
This transformation is available in case of 1D, 2D and 3D mesh parts.

Open the Sample09.CATAnalysis document from the samples directory.

  • To create a 1D or 2D transformed mesh part, the FEM Surface (FMS) product is required.
  • To create a 3D transformed mesh part, the FEM Solid (FMD) product is required.
  • All the mesh parts must have been updated before creating a translation mesh part.
  1. Click Translation Mesher in the Mesh Transformations toolbar.

    The Translation dialog box appears.

    • Mesh Part: lets you specify the mesh part to extrude.

      Multi-selection of mesh parts is available.

      • Remove: lets you remove a selected mesh part from the Mesh Part field.
      • Remove all: lets you remove all the selected mesh parts from the Mesh Part field.
    • Translation Parameters
      • Direction: lets you specify the direction of the translation.
      • Distance: lets you specify the value and the orientation of the translation.
    • Capture: lets you capture updated mesh parts to condense modes.
      • No condensation: lets you decide not to condense the nodes of the transformed and the parent mesh part.
      • Condensation with the parent mesh: lets you condense the nodes of the transformed and the parent mesh part.
      • Condensation with all meshes: lets you condense the nodes of the transformed mesh part and the updated neighboring mesh parts.
      • Tolerance: lets you specify the tolerance value of the condensation (not available with the No condensation option).
      • Initialize: lets you automatically initialize the tolerance value of the condensation (not available with the No condensation option).

        The tolerance initialization does not take into account 1D elements.

        • If Condensation with the parent mesh is selected, the tolerance is initialized with the smallest size of element edges among the parent mesh.
        • If Condensation with all meshes is selected, the tolerance is initialized with the smallest size of element edges among all updated neighboring mesh parts.
    • Check: This button is active as soon as you click the Apply button. This button lets you check, using the tolerance value, if there are intersections or interferences between the transformed mesh and the captured mesh parts according to the condensation option you have selected (not available with the No condensation option).
      To know more, refer to Checking Intersections / Interferences.
    • Repeat Translation: allows multiple copies in a single transformation mesh part.
      • Number of copies: lets you specify the number of copies.

    Note that: This transformation respects associativity.
    In other words, if a load is applied to the parent mesh part, the same load will be applied to the transformed mesh part.

  2. Select the Advanced Surface Mesh.1 mesh part.

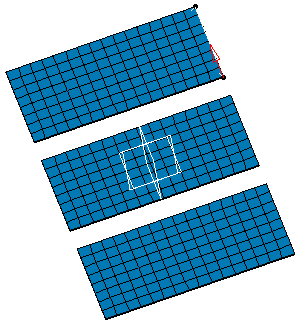
  3. Select the desired direction.

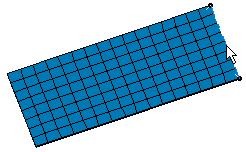
    Note that as soon as you have selected the direction of translation, a red arrow appears.
    This arrow indicates the reference direction of translation.

  4. Type the desired value of translation in the Distance field.

    In this particular case, enter 50mm.

    You have the possibility to enter a positive or negative value to define the orientation of the translation.

  5. Select No condensation as Capture option and enter 1 as Number of copies value in the Translation dialog box.

  6. Click Apply.

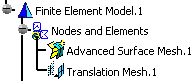
    A Translation Mesh.1 object appears in the specification tree and the translation mesh part is created.

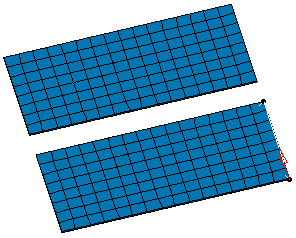
  7. Enter -50mm as Distance value and 2 as Number of copies value in the Translation dialog box.

  8. Click Apply.

    As a result, the translation mesh part appears in the opposite direction.

  9. Click OK.