This task shows how to analyze the quality of the elements relatively to given criteria, on one or more parts.
Open the Sample11.CATAnalysis document from the samples directory.
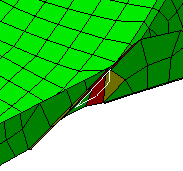
The mesh elements are assigned green, yellow or red colors.
For more details, refer to Before You Begin.
-
Click Quality Analysis
 in the Mesh Analysis Tools toolbar.
The Quality Analysis dialog box appears for visualizing element quality in accordance with selected criteria.
Note that each time you modify the criteria list, you need to select the Apply button to have the below detailed information (Statistic, Report, Select, Worst element) as well as the Finite Element Model visualization updated.
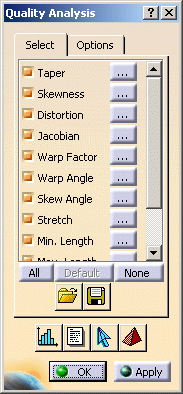
- Select tab
This tab lets you select or not the criteria on which you want to analyze the element quality. You can define a set of criteria you want to optimize in the mesh or take those define by default.
If you do not define any criterion, the mesh is not optimized.Click the
 button to get the below basic and advanced information
about a given criterion.
button to get the below basic and advanced information
about a given criterion.- Infos tab:
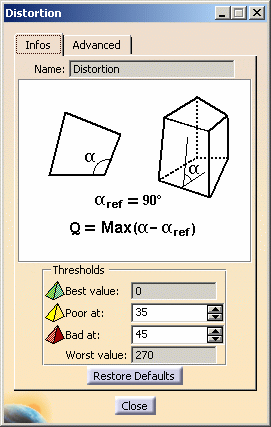
- Name: the name of the selected criterion.
A drawing as well as a definition is also provided. - Threshold: the values at which you decide
the element is good (green color), poor (yellow color) or
bad (red color).
You can Restore Defaults you previously entered.
- Name: the name of the selected criterion.
- Advanced tab
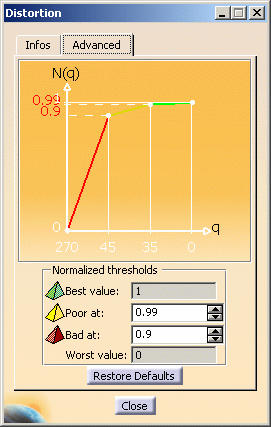
- A graphic is provided that illustrate the criteria normalized threshold.
- Normalized thresholds: allows modulating the
weight of a criterion. The computation of the normalized
quality (criteria normalized function) results from the
interpolation of the quality with both the Poor and the Bad
weight that can be customized.
You can Restore Defaults you previously entered.
- Import Criteria

Lets you choose a criteria configuration from a predefined list.
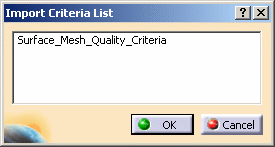

For more details about managing the Import Criteria predefined list, refer to Quality.
- Export Criteria

Lets you save a criteria configuration to a predefined directory.
By default, there is no pre-defined directory.
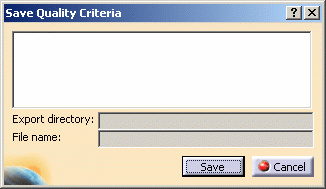
You have to customize the quality settings: you can use the Export Criteria option only if a default directory is defined in the Options dialog box.
For more details about managing the Export Criteria default directory, refer to Quality.
- Infos tab:
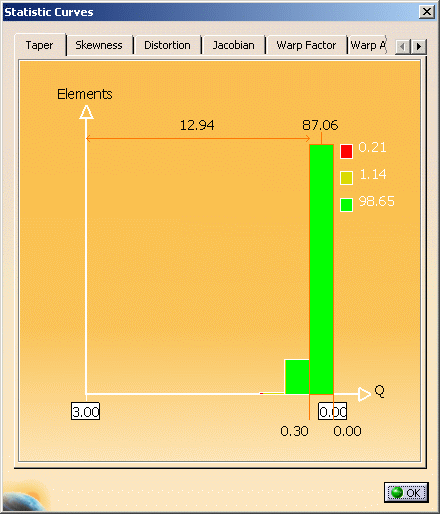
- Show Statistic Curves

In this example, choose the Distortion tab. You use the arrow to visualize the stated percentage for a given element threshold.
Note that the information displayed in the Statistic Curves box depends on the options you pre-defined in the Quality Analysis dialog box (Options tab).
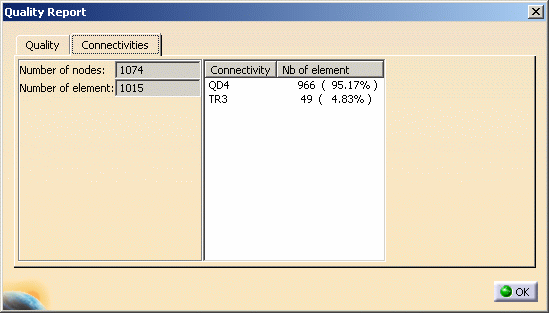
- Show Quality Report

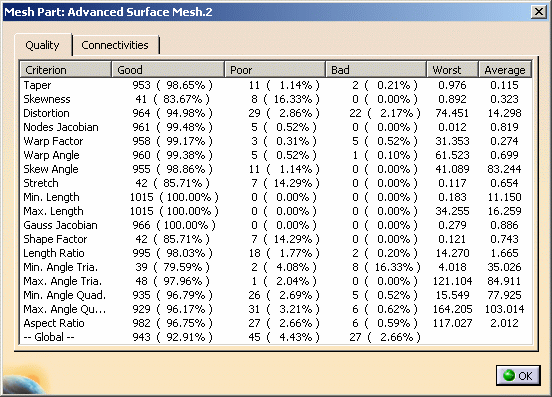
If you click this button, the Quality Report dialog box appears and gives you access to quality or connectivity information.- Quality tab
Information on Good, Poor, Bad, Worst or Average statistic for all the previously selected criteria.
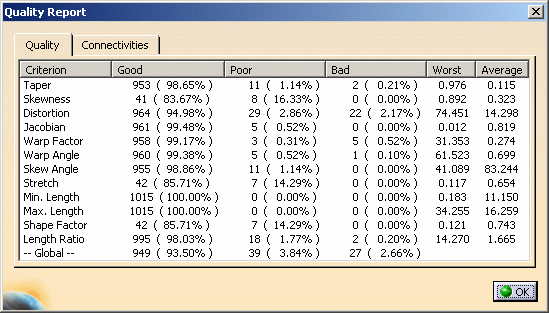
- Connectivities tab
Information on the mesh elements number, type, node in the current Finite Element model:
- Quality tab
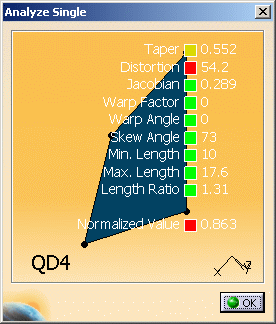
- Analyze an Element

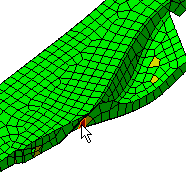
You can also select one element have this element analyzed.
For example:
The Analyze Single box appears with the quality type (Good, Poor, Bad) and value for all the selected criteria assigned to this particular element.
- Worst Elements Browser

The Worst Elements Browser dialog box appears. You just need to click the Next button to have the worst elements zoomed.
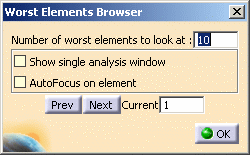
- Show single analysis window: the Single Analysis window of the current worst element remains displays and updates as you browse a Next element.
- AutoFocus on element: the worst browsed element is
automatically auto focused.
For example:
- Select tab
-
Select the desired criteria from the Quality Analysis dialog box.
-
Analyze the quality of the other mesh part.
-
Simultaneously perform the operation on all the parts you want to analyze.
You will open as many Mesh Part dialog boxes as desired.
-
Click OK in the Mesh Part when you are satisfied with the information.
You can perform an independent check and validation for each part in an assembly.