-
In the previous task, while adding the shellable prism in the specification tree, the application also created the Shell Properties.1 entity. Double-click Shell Properties.1 and look at what it contains.
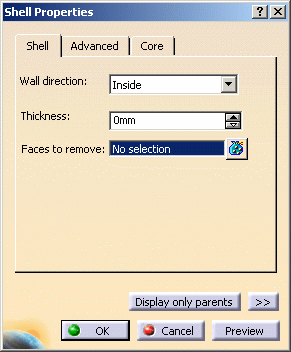
The Shell Properties dialog box displays a thickness value that applies to the prism.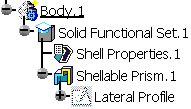
-
Enter 1.5mm in the Thickness field to edit the default thickness.
-
Select the bottom face as the opening face.
Clicking the icon displays the Faces to
remove dialog box that allows you to:
icon displays the Faces to
remove dialog box that allows you to:View the list of all of the selected faces Remove any face clicking the Remove button
Replace any face using the Replace button and selecting a new one in the geometry or the specification tree.
-
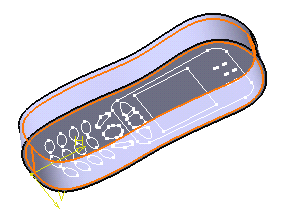
Click OK to confirm. The part now looks like this:
|
|
In a Nutshell
The Shell Properties dialog box lets you define the thickness of the part as well as its opening faces. The thickness value you enter will apply to all of the functional features in the same body that create walls, as well as to additional shellable volumes. See Setting Shell Properties for more details.