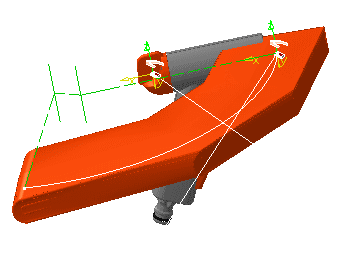
This scenario assumes that you performed a clash analysis between two items. You generated a simple swept volume:
You are, however, not satisfied with the swept volume result because you need a coarser result.
-
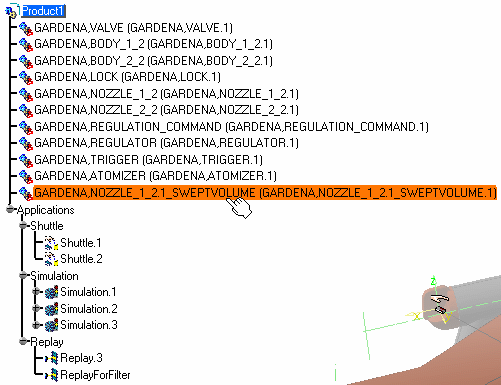
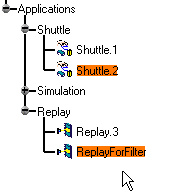
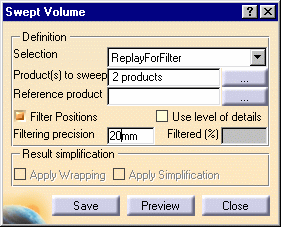
Select ReplayForFilter in the specification tree.
-
Click Swept Volume
 .
.The Swept Volume dialog box is displayed. 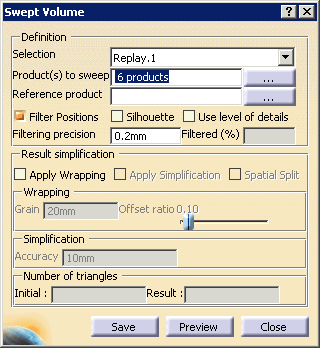

The dialog box shown above (and in subsequent images throughout this procedure) is available to users whose configuration includes the DMU Optimizer product. If your configuration does not include DMU Optimizer, you do not see the Result and Simplification options. See Defining a Swept Volume for an image of the Swept Volume dialog box without these options. -
Select the multi-select button
 to the right of the
Product(s) to sweep field for a list of the products this replay
has available for you to sweep.
to the right of the
Product(s) to sweep field for a list of the products this replay
has available for you to sweep.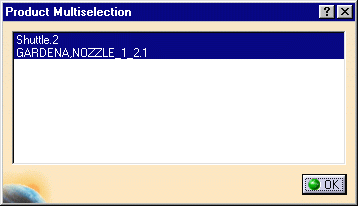
-
Multi-select shuttle 2 and GARDENA_NOZZLE_1_2.1
-
Click OK on the Product Multiselection dialog box.
-
In the Swept Volume dialog box, enter 20mm as filtering precision value.
-
(Optional) You can also compute a silhouette before the swept volume. This is very useful when handling large models as the silhouette operation removes useless triangles.
-
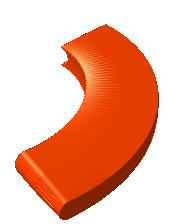
Click the Preview button.
The Preview window shows the result: 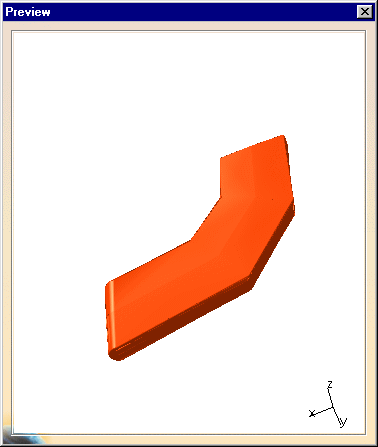
-
Click the Save button on the Swept Volume dialog box.
The Save As dialog box appears: For the purposes of this teaching scenario, we ask you to select cgr. Depending on your needs when you are actually using the product, you can also select stl, wrl, or model file types. -
Select cgr from the Save as type list.
-
Click the Save button on the Save As dialog box.
You are invited to save as many products as were listed in the Product(s) to sweep field of the Swept Volume dialog box (i.e., six). Each product will have its original name with _SWEPTVOLUME appended, plus the selected file type extension. -
Click the Close button on the Swept Volume dialog box.
When you select the Save button on the Swept Volume dialog box, the Swept Volume
remains active. You can therefore launch a calculation again if
needed. Once you are satisfied with all the calculations and
are ready to exit the command, use the Close button. -
Insert the GARDENA,NOZZLE_1_2.1_SWEPTVOLUME.cgr into Product1.
To insert the cgr, right-click Product.1 in the specification tree, and select Components > Existing Component. The swept volume is identified in the specification tree and in the geometry area.