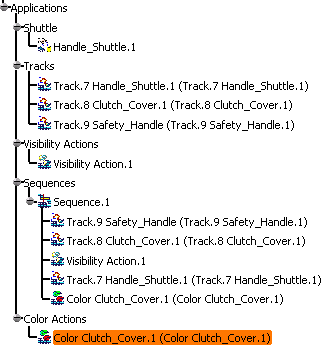
- CHAINSAW_BODY_HANDLE.1 object which makes the dismounting impossible
- CHAINSAW_BODY_CLUTCHCOVER.1
- CHAINSAW_BODY_SAFETYHANDLE.1
To effect this, you will perform the following operations:
- Creating a track on CHAINSAW_BODY_CLUTCHCOVER.1 (Clutchcover_Track) within the sequence command
- Running the sequence
- Modifying action duration and scheduling within the sequence
- Running the sequence again
- Modifying the player parameters
- Running the sequence again
- Creating a track on CHAINSAW_BODY_SAFETYHANDLE.1
- Defining a color action on CHAINSAW_BODY_CLUTCHCOVER.1
- Adding and scheduling this color action in the
current sequence
-
If the Edit Sequence dialog box is not currently open, click Edit Sequence
 .
.
In the next section, create a track on CHAINSAW_BODY_CLUTCHCOVER.1 in context. -
Select the Track
 from the DMU Simulation toolbar and select
CHAINSAW_BODY_CLUTCHCOVER.1 in the specification tree.
 The Track dialog box is automatically updated. Also, the new track is automatically created and added in the current sequence last step: 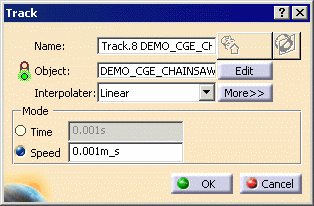

-
Move the 3D compass to remove the cover, and double-click Record
 .
.
The automatic insert mode is activated. -
Select the OK button in the Track dialog box to confirm the track creation.
-
Play your sequence using Play Forward
 from the Player.
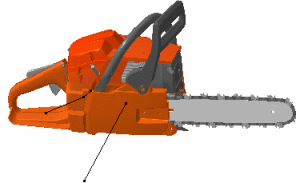
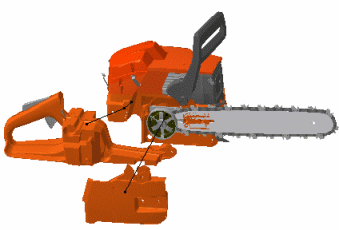
In the next section, you alter the sequence action duration and the scheduling -
In the Action in Sequence area of the Edit Sequence dialog box, select Handle_Shuttle_Track, and then enter 15 in the Action duration box.
-
In the Action in Sequence area of the Edit Sequence dialog box, select DEMO_CGE_CHAINSAW_BODY_CLUTCHCOVER.1 Track and then enter 15 in the Action duration field.
-
Select the Move up button so that DEMO_CGE_CHAINSAW_BODY_CLUTCHCOVER.1 Track is the second step.
The result should be: 
-
Play your sequence again using Play Forward
 from the Player toolbar.
In the next steps, you will make the sequence simulation run slower by customizing the player parameters. -
Click Parameters
 on the Player toolbar.
The Player Parameters dialog box is displayed: 
Enter 0.2 s in the Sampling Step box. -
Play your sequence again using Play Forward
 from the Player toolbar.
In the next section, you dismount the the CHAINSAW_BODY_SAFETYHANDLE.1 to create a safety handle track. -
Click Track
 from the DMU Simulation toolbar and select
DEMO_CGE_CHAINSAW_BODY_SAFETYHANDLE.1 in the specification tree.
 -
Swap to detach mode by clicking Attach/Detach
 on the Manipulation toolbar.
The 3D compass color changes; you are in the detach mode. The command's appearance changes  in the Manipulation toolbar.
 -
Click Smart Target
 from the Manipulation toolbar or drag and drop the command
onto the cylinder.
 The Smart Target  is highlighted and the Smart Target dialog box appears.
(The Invert snap direction buttons may not be available.)
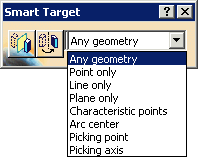
-
Use the Smart Target
 to select an appropriate location to snap the compass to the part.
Zoom out if necessary. -
Once the compass has been correctly positioned on the part, click Smart Target
 (to turn off) and then return to the Attach
 mode. In both cases, you do this by clicking the highlighted
commands.
 -
Perform a rotation with the compass to dismount the handle, and click Record
 on the Recorder toolbar.
 -
Click OK on the Track dialog box to finish creating the safety handle track.
-
In the Edit Sequence dialog box, select DEMO_CGE_CHAINSAW_BODY_SAFETYHANDLE.1 Track, and then enter 15 in the Action duration box.
-
Select the Move up button until the safety handle track is the first step.
In the next section, you will make the CHAINSAW_BODY_CLUTCHCOVER.1 become transparent during sequence simulation and before dismounting. -
Click Color Action
 in the DMU Simulation toolbar.
The Color Action dialog box appears. 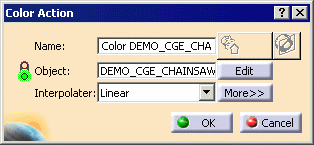
-
Select CHAINSAW_BODY_CLUTCHCOVER.1 either in the specification tree or in the geometry area.
The Graphic Properties toolbar appears. 
-
In the Graphic Properties toolbar, set the color to orange (using the list in the leftmost box) and set the transparency to 25% (using the list in the second-from-the-left box).
-
Select the OK button in the Color Action dialog box.
-
In the Edit Sequence dialog box, select the Move up button twice and the Merge up button once to schedule this color action in step 2.
This ensures that the the transparency action is triggered at the beginning of the CHAINSAW_BODY_CLUTCHCOVER.1 dismounting. 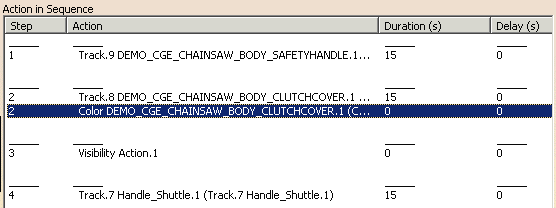
-
Replay your sequence using the Player.
Actions are scheduled in a logical way: - CHAINSAW_BODY_SAFETYHANDLE.1 track (step 1)
- CHAINSAW_BODY_CLUTCHCOVER.1 track (step 2)
- Transparency action (step2)
- Visibility action (hiding the CHAINSAW_BODY_HANDLE.1) (Step 3)
- Handle_Shuttle_Track (Step 4)
-
Select the OK button in the Edit Sequence dialog box.
-
Right-click the action and select Properties to rename the action with a meaningful name.
For example: 